APIs are a great way for applications to communicate and exchange data. JSON API is a powerful tool that allows users to integrate any external data sources. In addition JSON APIs are useful data to create reports and dashboards in Looker Studio.
However, there’s no way to integrate these external APIs. Two Minute Reports solves this problem. By using API Bridge, users can easily connect different APIs that are not included in Looker Studio. This provides a great opportunity for users to get the most out of their data and expand their access to new data sources. You can reduce your time creating reports.
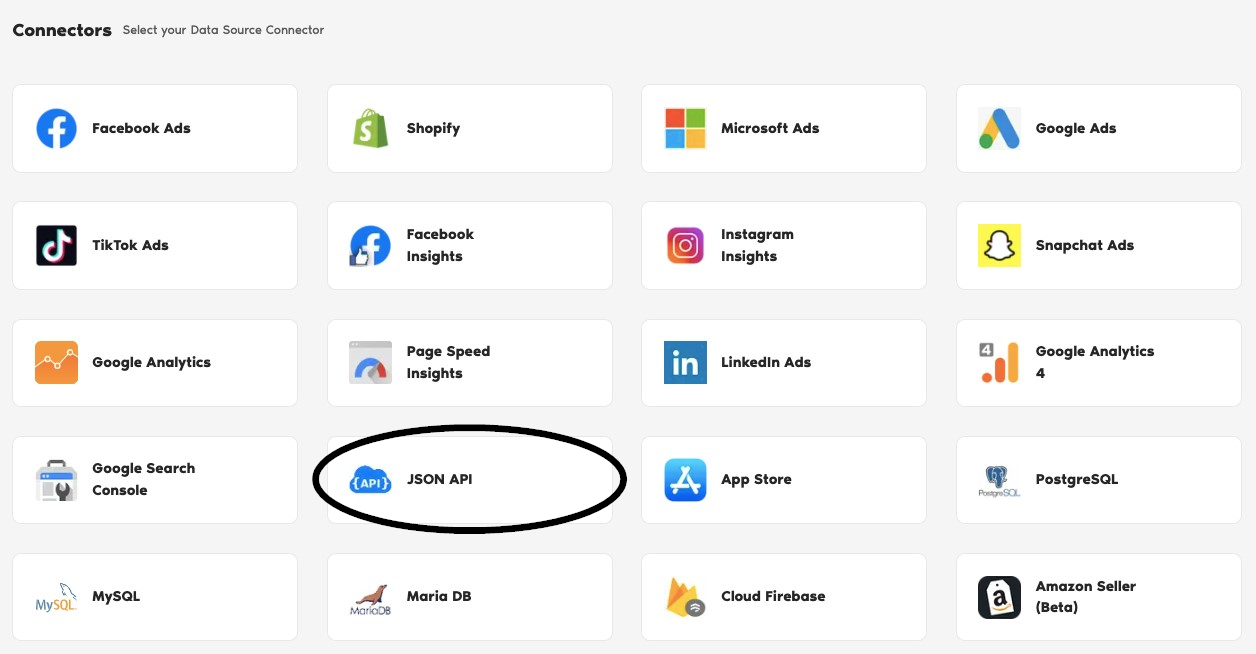
Select JSON API in the TMR Portal
The first thing to do is to go through our portal and select the data source you want to add.
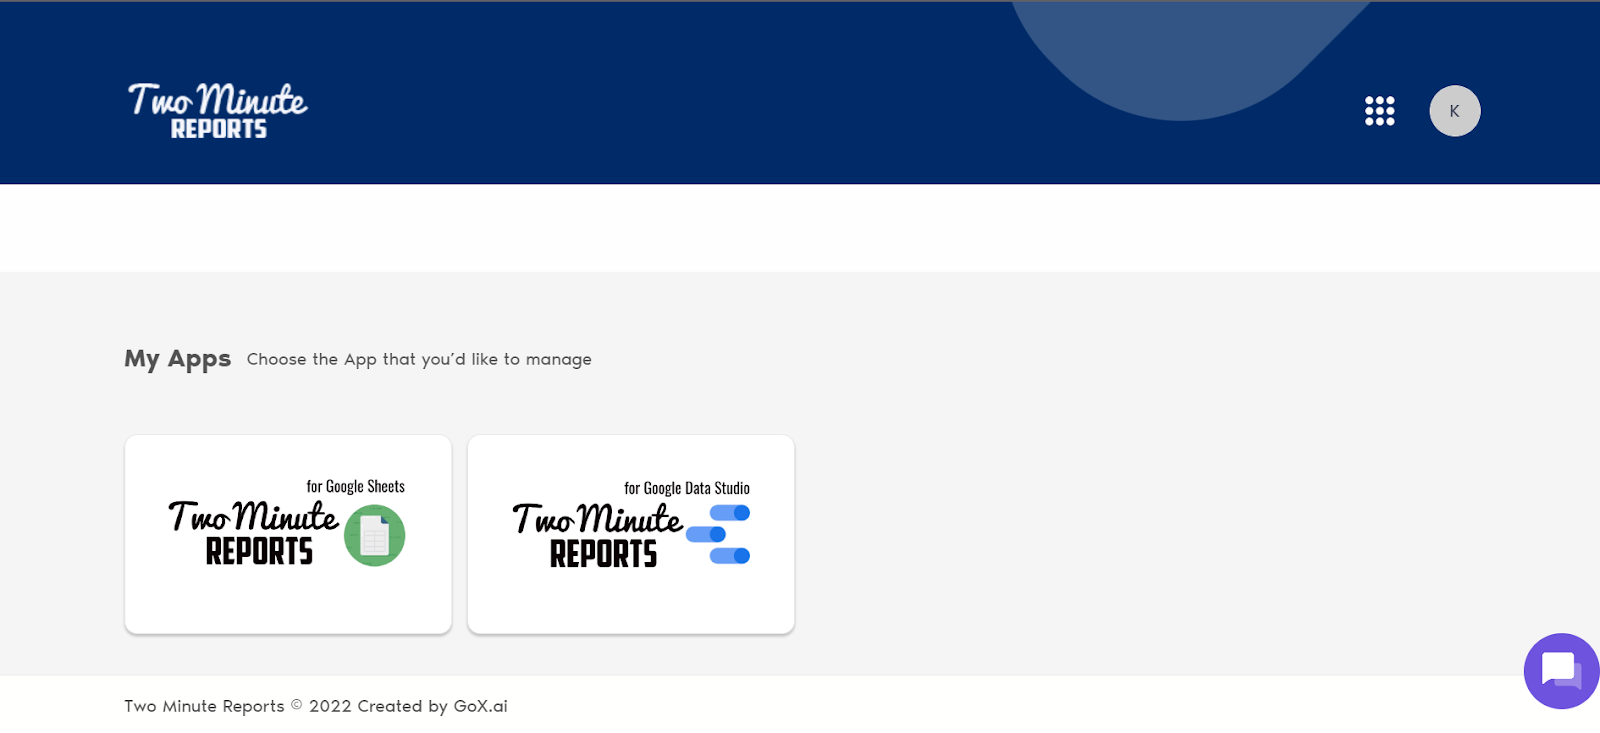
- Go to apps.gox.ai and Login to your account.
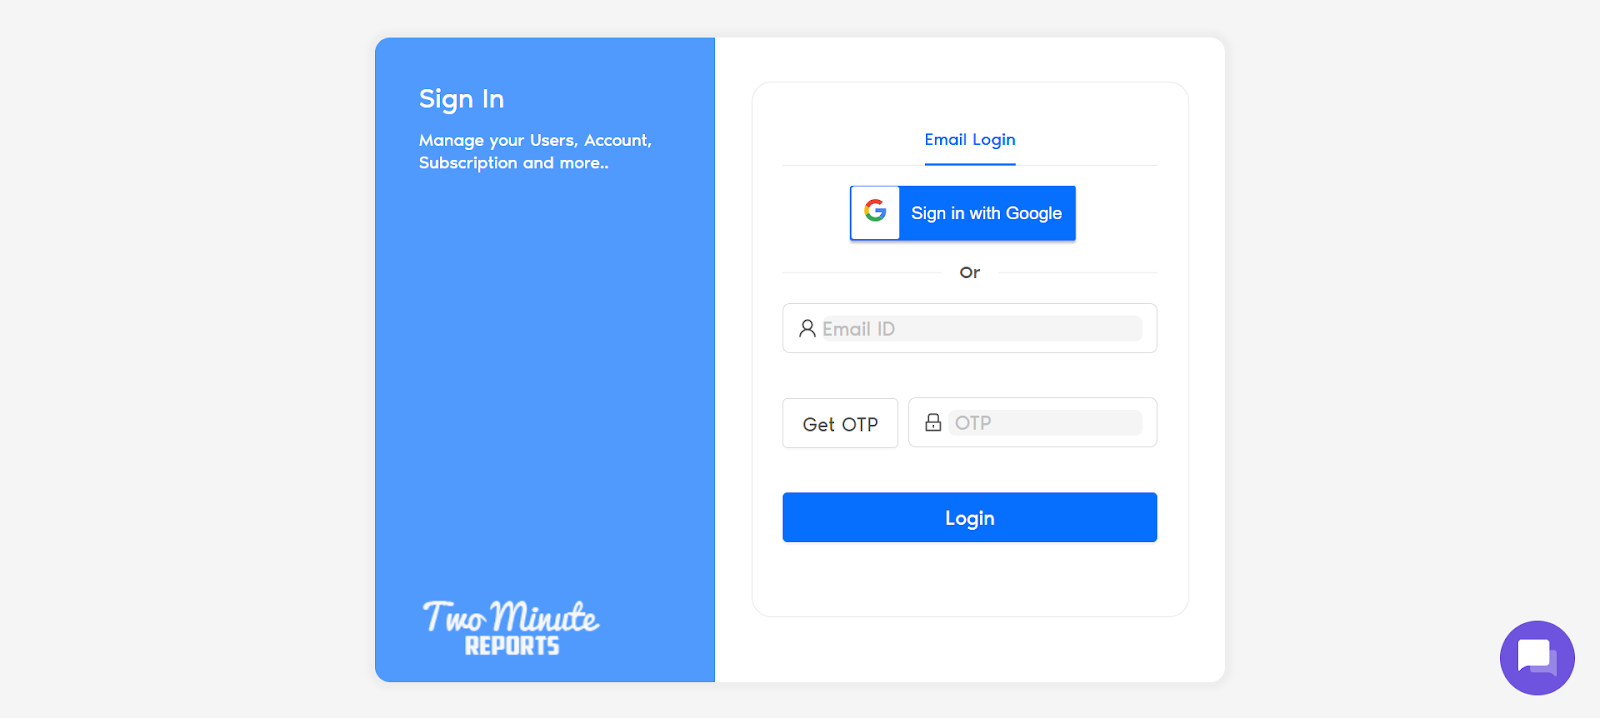
- Choose Two Minute Reports for Looker Studio (the blue one).
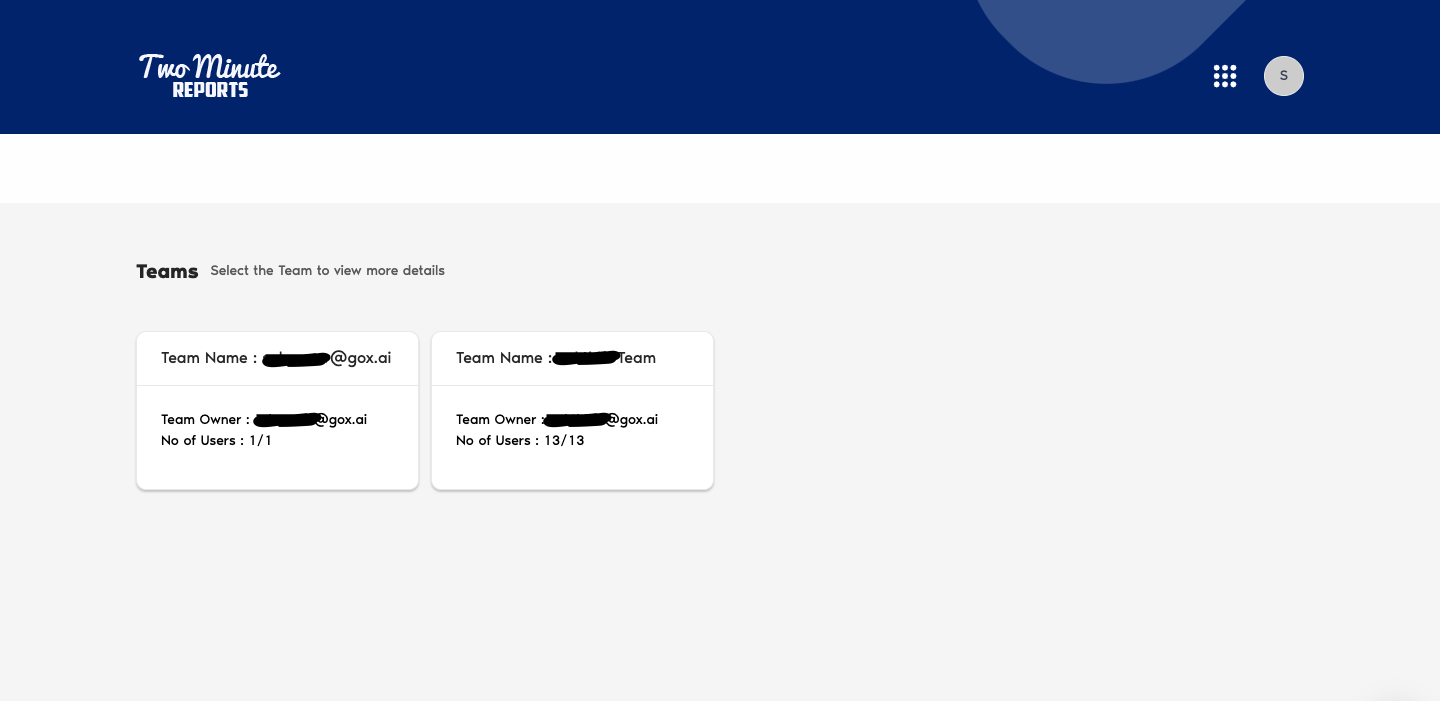
- Select your team. If you only have one team, you skip this and TMR automatically redirects you to the connectors page.
You will now see the connectors page.
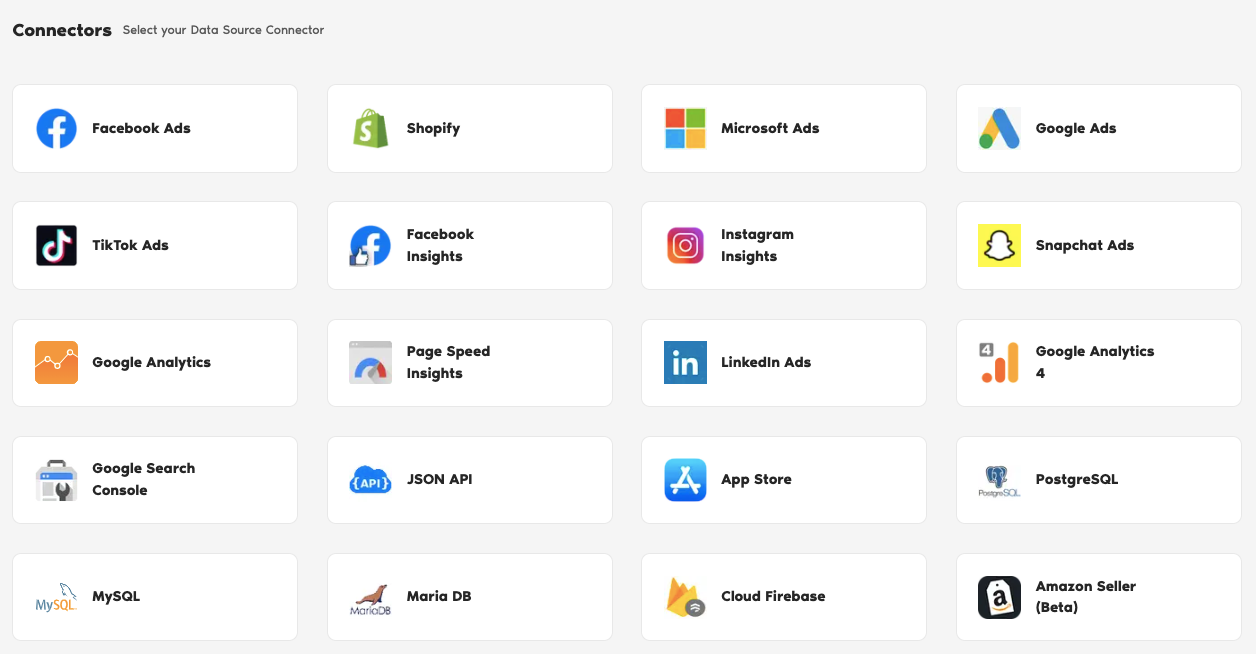
- In the connectors page, find and select JSON API.
The next series of steps is to configure your choice of API with TMR.
Connect Your API with TMR
In this section, you need to go to your external API for authentication making sure it connects with TMR and Looker Studio.
- Under Data Sources, click +Add New button. Name your data source.
- Enter the Base URL of the API. Make sure the Base URL is not ended with a forward slash
/. - Provide the Authorization credentials if needed. It includes either of the three below depending on the API:
- Basic Authorization (Username and Password).
- No Authorization.
- Bearer Token.
- Enter Header fields if the headers is included.
- Click the blue Save button.
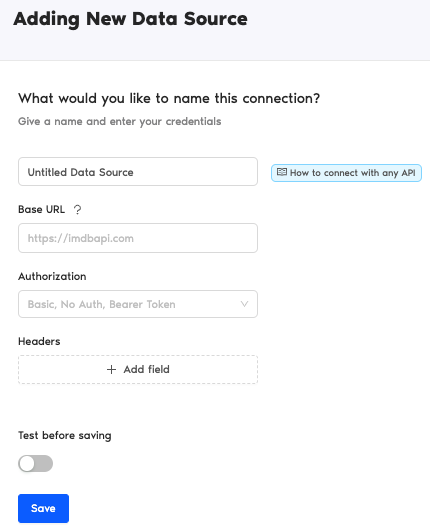
- You can toggle Test Before Saving and select a method (GET/POST/PUT) from the Method dropdown and give a Suffix URL (For example:
/public-api/productsor/products). And then click on the Test and Save button to check if the connection strings are valid and Save the Data Source. Suffix URLs should start with a forward slash/.
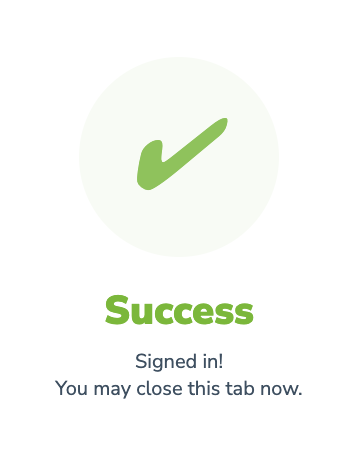
- If successful, Two Minute Reports gives a prompt “Signed in! You may close this tab now.“
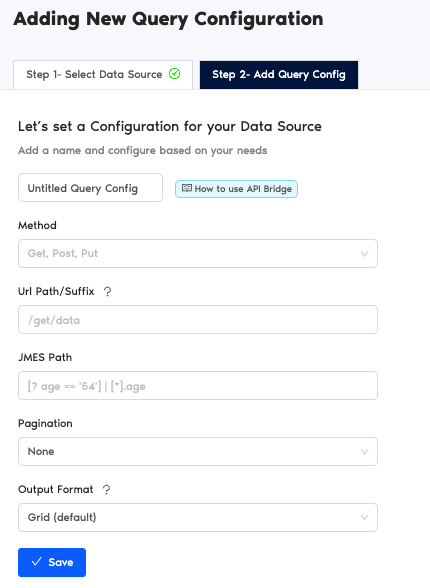
Configuring Your API with TMR
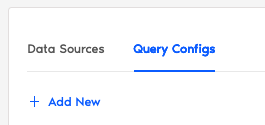
- In the Query Configs section, click + Add New button. Choose the data source you added earlier. Click Next.
The next following steps is where you configure your Firebase settings to TMR so that you can create reports in Looker Studio. You may configure the following parameters depending on your preference as TMR has imported them.
- Name your query config.
- Select the Method.
- Enter the URL Path/Suffix.
- You can provide a JMESPath optionally if you want to extract a specific set of data from the endpoint. Learn more about JMESPath in How to use JMESPath?
- Click Save.
How to Format Output
- You may select the output format in which you want the data. By default, the Grid output format is selected.
- Grid Format – If a field is deeply nested in a JSON, the Grid format creates new rows for each nested row and copies down other respective columns.
- Flat Format – If a field is deeply nested in a JSON, the Flat format creates new columns for each nested field.
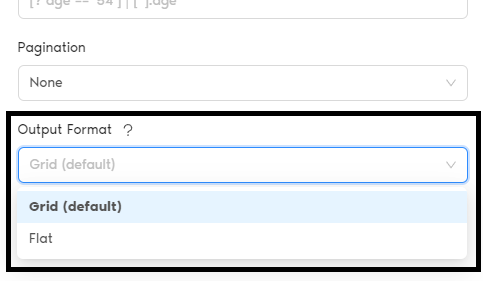
Learn more about Output Formats in Output Formats in API Bridge.
How to Handle Pagination
- You may the pagination if you want to make a request by pages, limits, or offsets. By default, None is selected. Other pagination types are,
- Page Parameter – Specified with the range between the pages. And the results will be fetched running through each page.
- Offset-Limit – Specified with the offset and limit value.
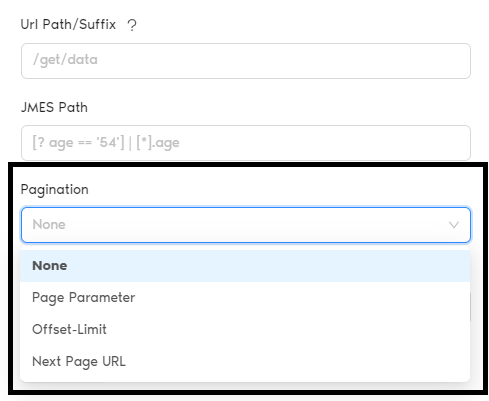
Learn more about Pagination Handling in Pagination Handling in API Bridge.
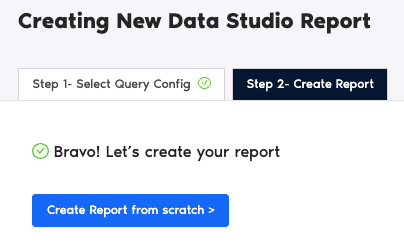
Once everything is finished, click Create Report. The next section is creating reports in Looker Studio.

Create an API Report with TMR in Looker Studio
After connecting the API, you can create your own custom dashboard with TMR in Looker Studio. Looker Studio is a powerful data visualization tool that contains many features to help you reduce time creating reports.
- After clicking Create Report from the previous section, click blue Create Report from scratch button.
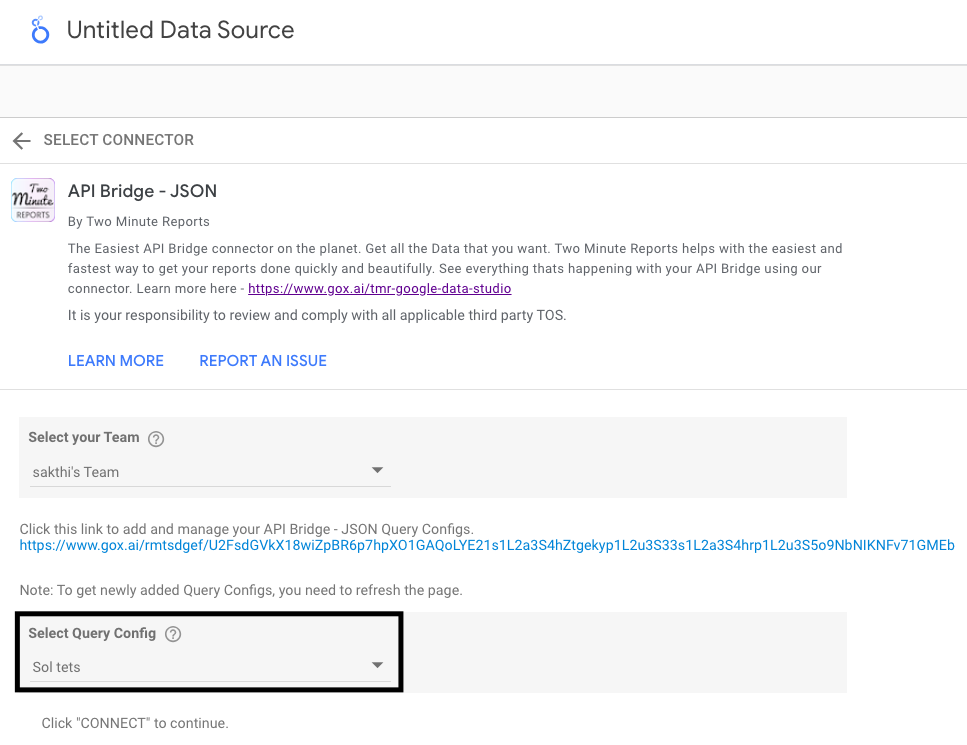
- You are redirected to Looker Studio. In Looker Studio, under Select Query Config, choose the configuration you created earlier (it should be the name you gave it). Under Select your Team, choose the appropriate team as well if the dropdown is showed to you.
- Click Connect blue button in the upper right side of the page.
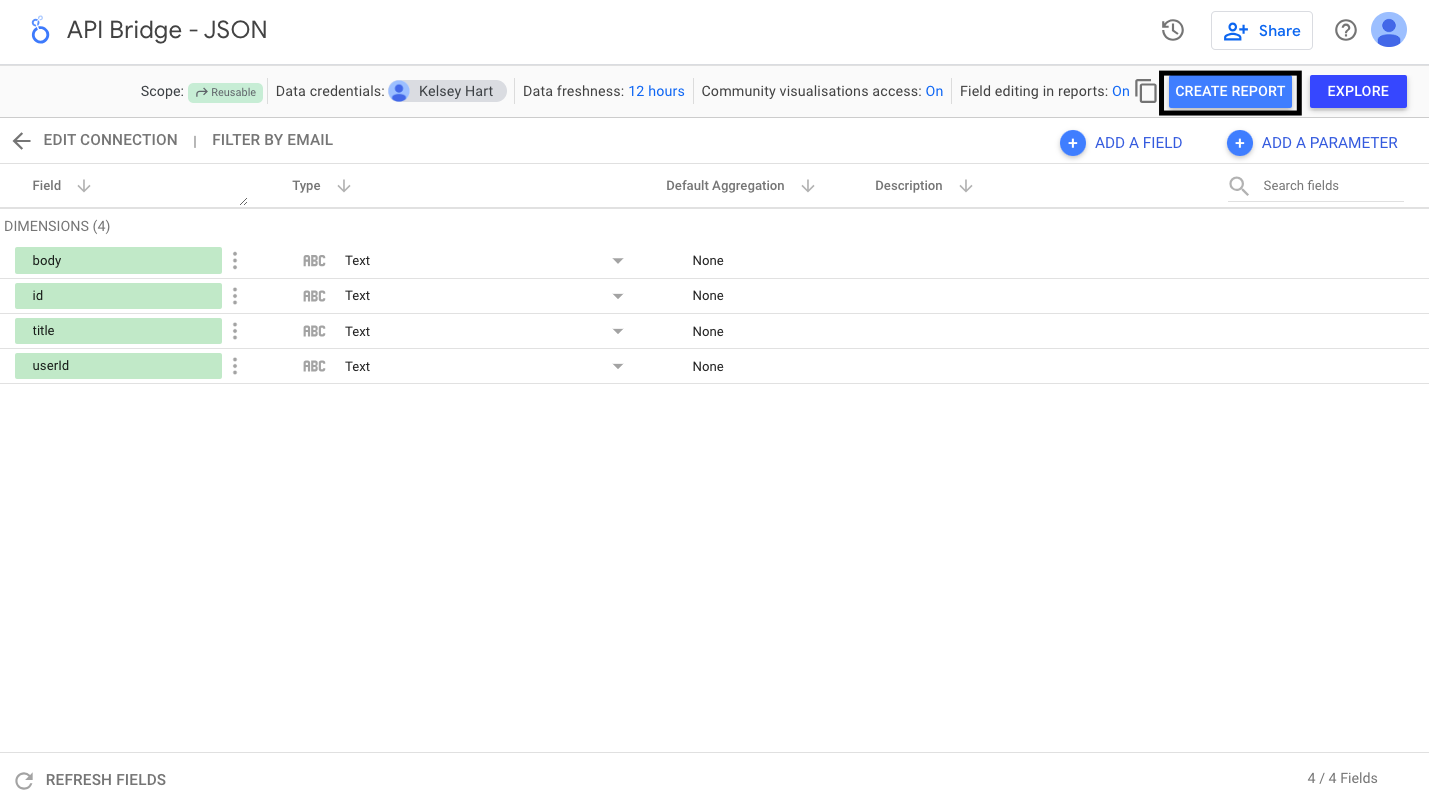
- You can now view the API schema on Looker Studio. Click Create Report in the right side of the page.
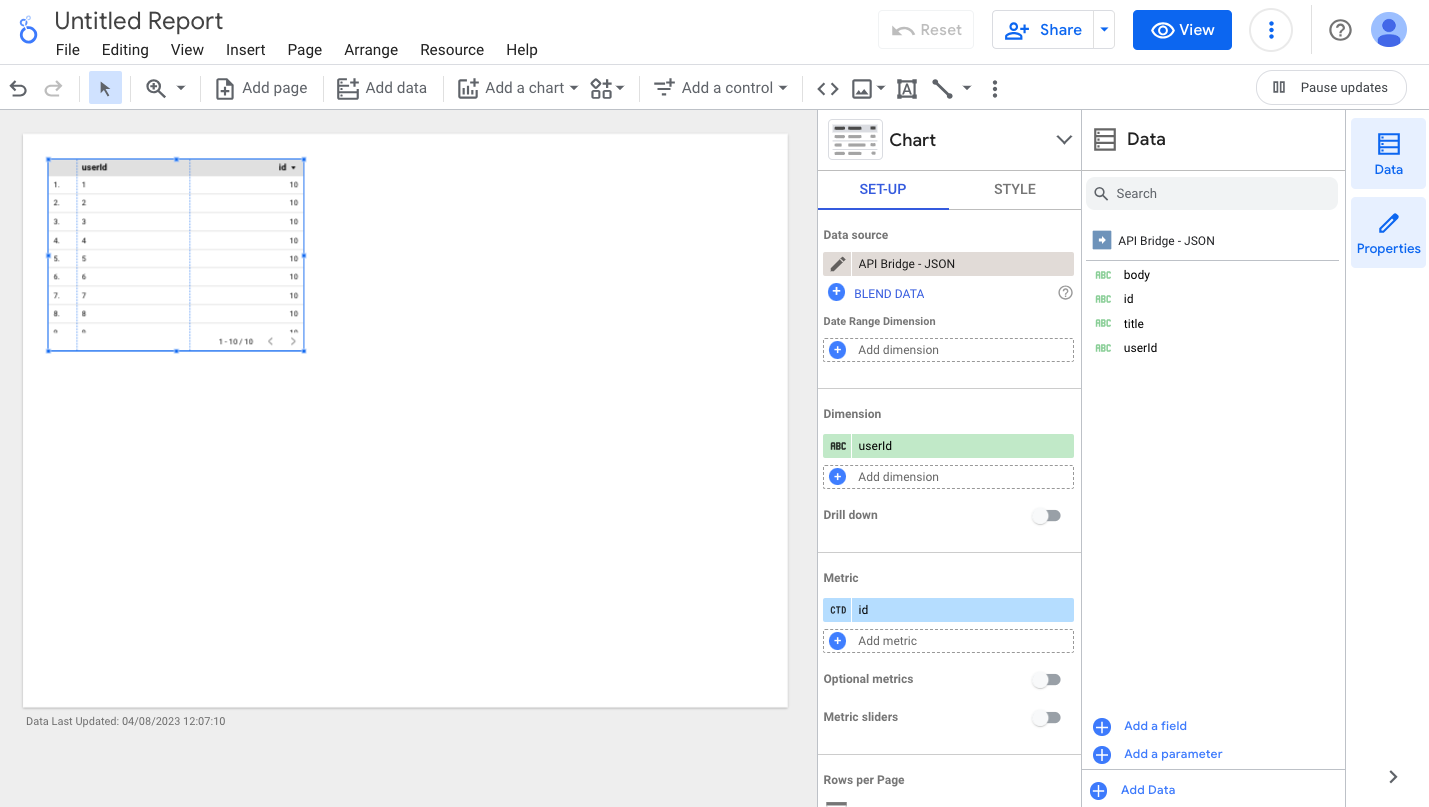
Once everything is loaded, you are presented with a blank canvas. You can now create custom reports (adding dates and charts) in Looker Studio with your API data.
If you want to learn about creating your own report, like adding dates and charts, read How to Create a Report in Looker Studio.