This article will help you create a new query configuration for ChatGPT and explain each setting, including input options, data options, GPT model options, and more.
Create a new query configuration in Two Minute Reports.
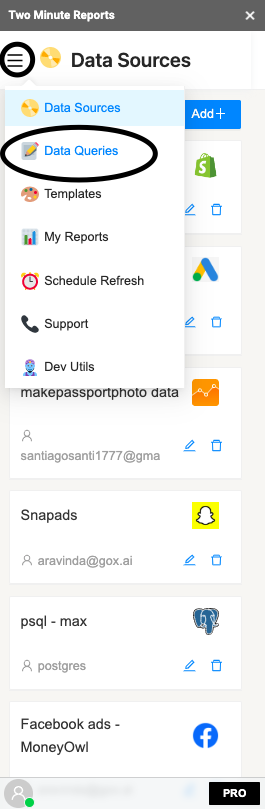
Once you have created your data source, you will be directed to the Data sources section. Click on the Menu icon and select the Data Queries option.
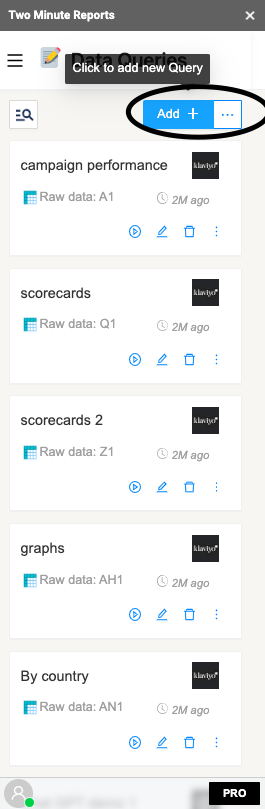
Once you are in the Data queries section, click on Add + to create a new ChatGPT Query.
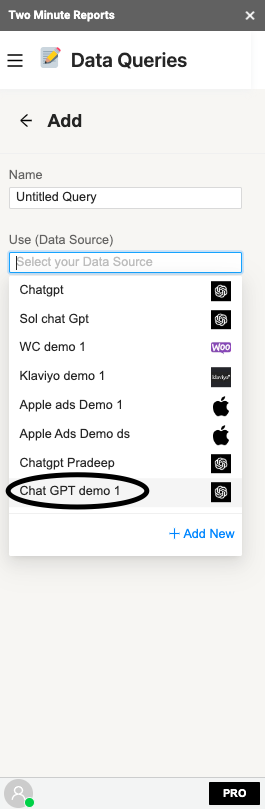
Once you are inside the Data queries configuration section, you can name your new ChatGPT query and select the newly created Data Source to be used in this query.
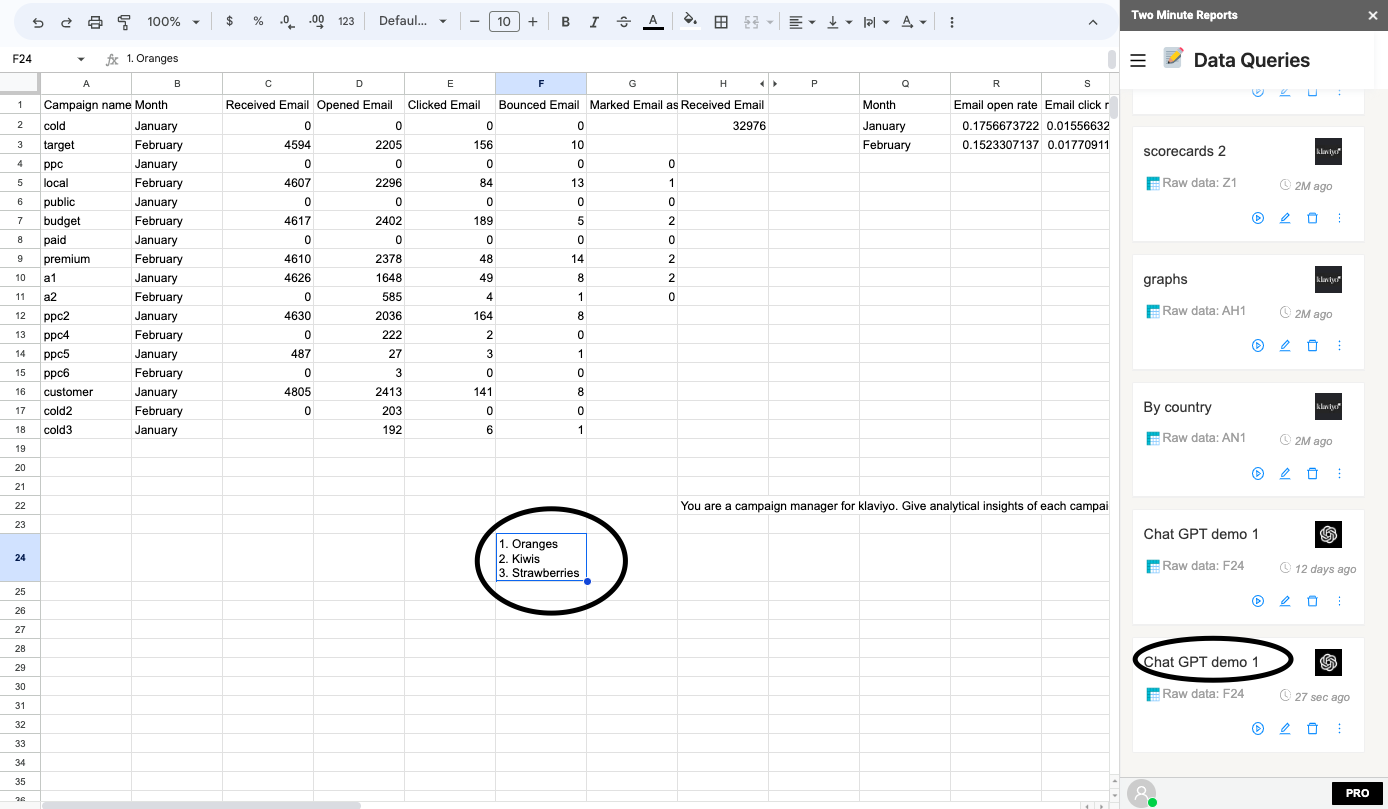
Now, choose the cell location where you want your data to be displayed. Next is the Prompt. A prompt can be defined as the task you want ChatGPT to perform. In this first example, I will only give a prompt to ChatGPT and receive the output for it. To get output without a spreadsheet input, you need to choose Spreadsheet Input as No and click on Run Query.
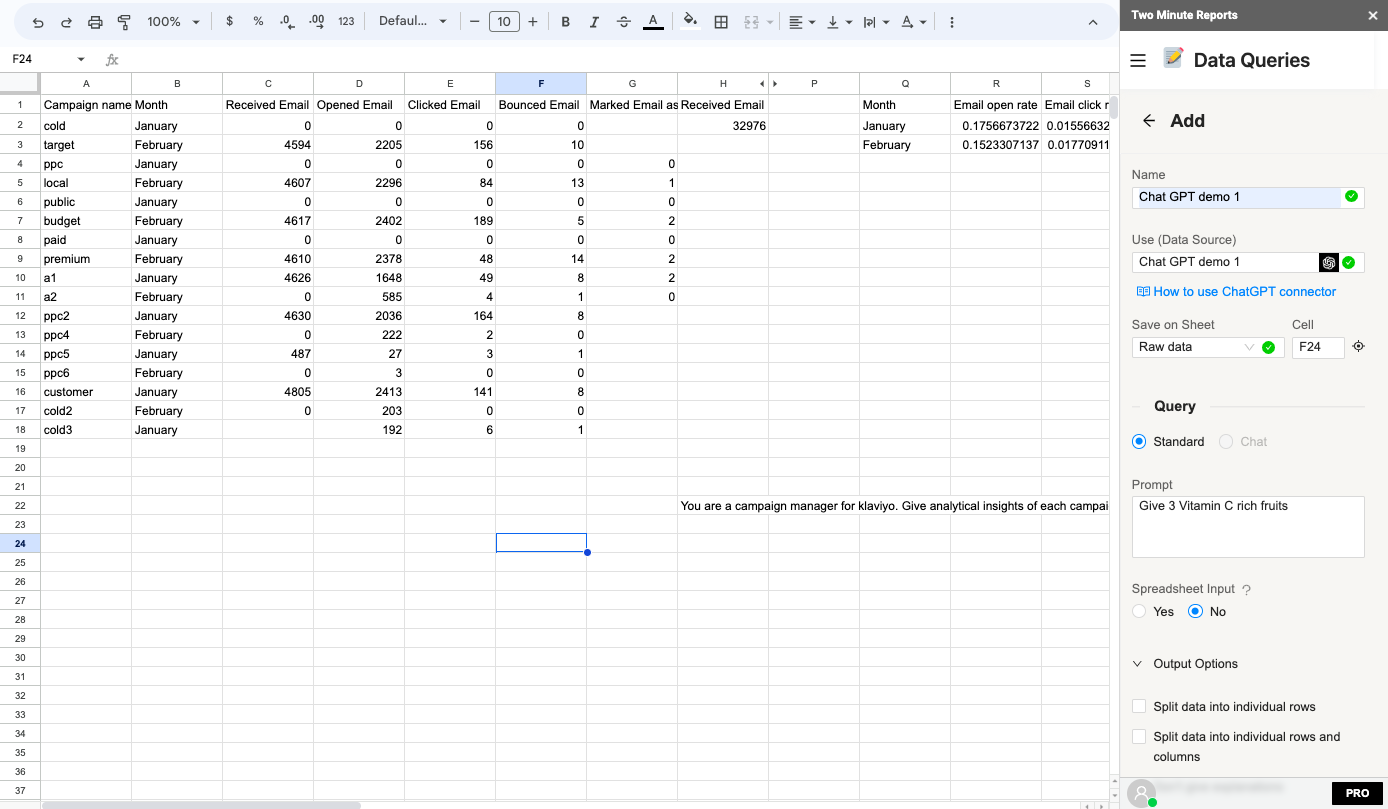
We have received the results for the given prompt in cell F24. This is the basic computation of a prompt using ChatGPT. You can view the query in the Data Queries section.
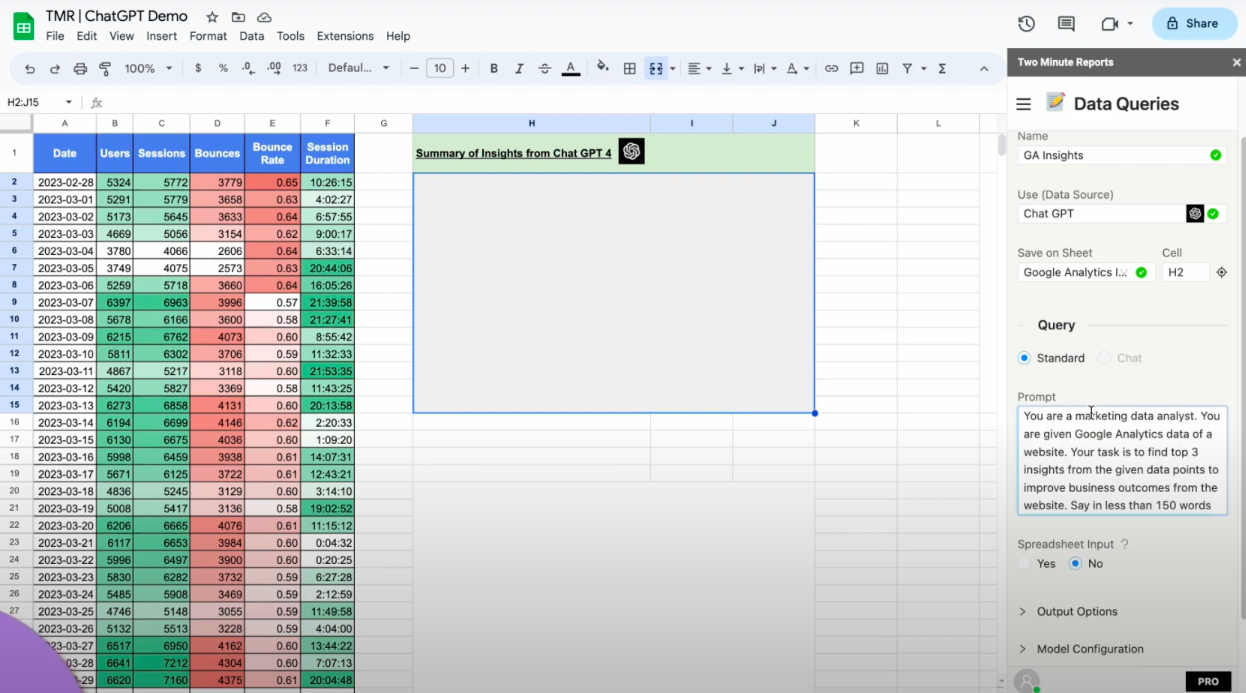
Example 1: Use Spreadsheet data as input to fetch insights of a Google Analytics Dashboard.
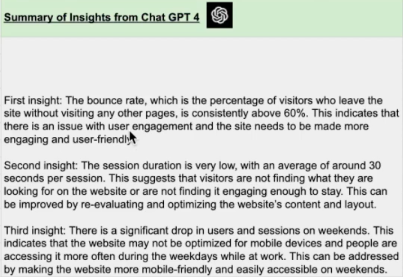
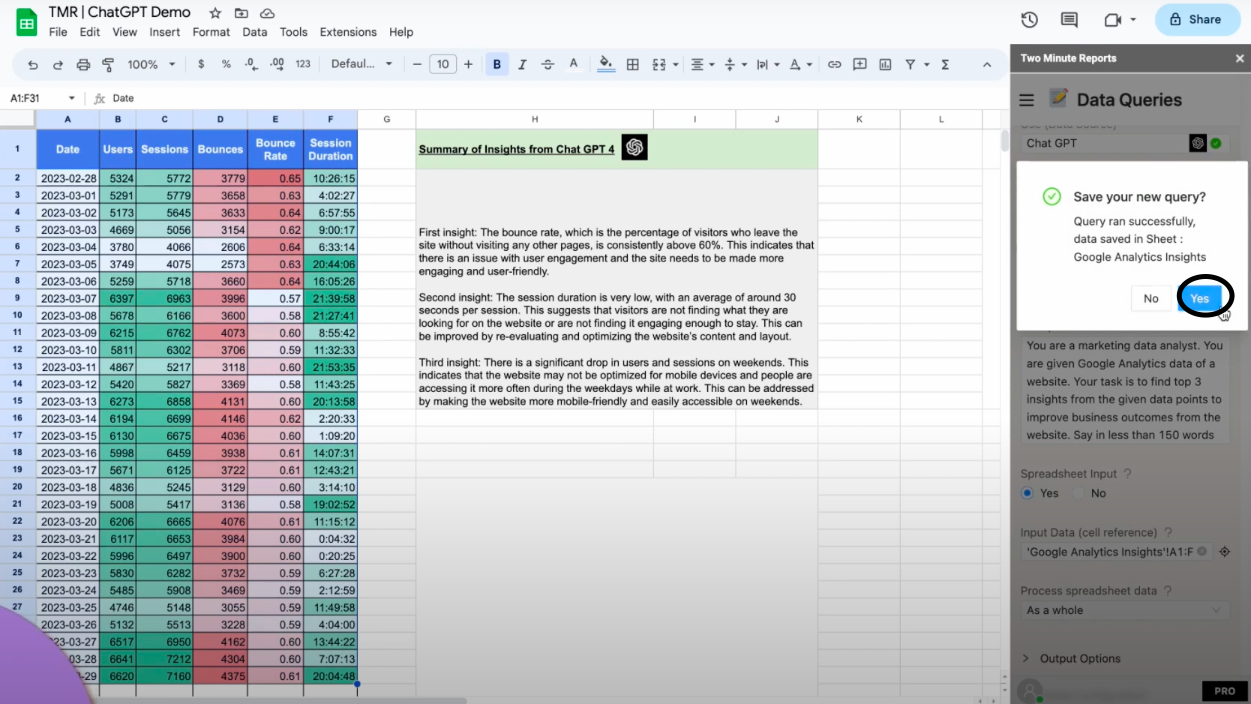
In this example, we have Google Analytics data in a tabular form. Our objective is to fetch the top three insights of the website’s performance by inferring the given GA table. Hence, we give the Prompt as “You are a marketing data analyst. You are given Google Analytics data of a website. Your task is to find the top three insights from the given data points to improve business outcomes from the website. Say in less than 150 words.”
Follow the same steps for creating the query as in example 1. The change you will make is to select Spreadsheet input as Yes and choose the Spreadsheet cell location as the GA table. You can select the input range and click on the target icon to select the cells.
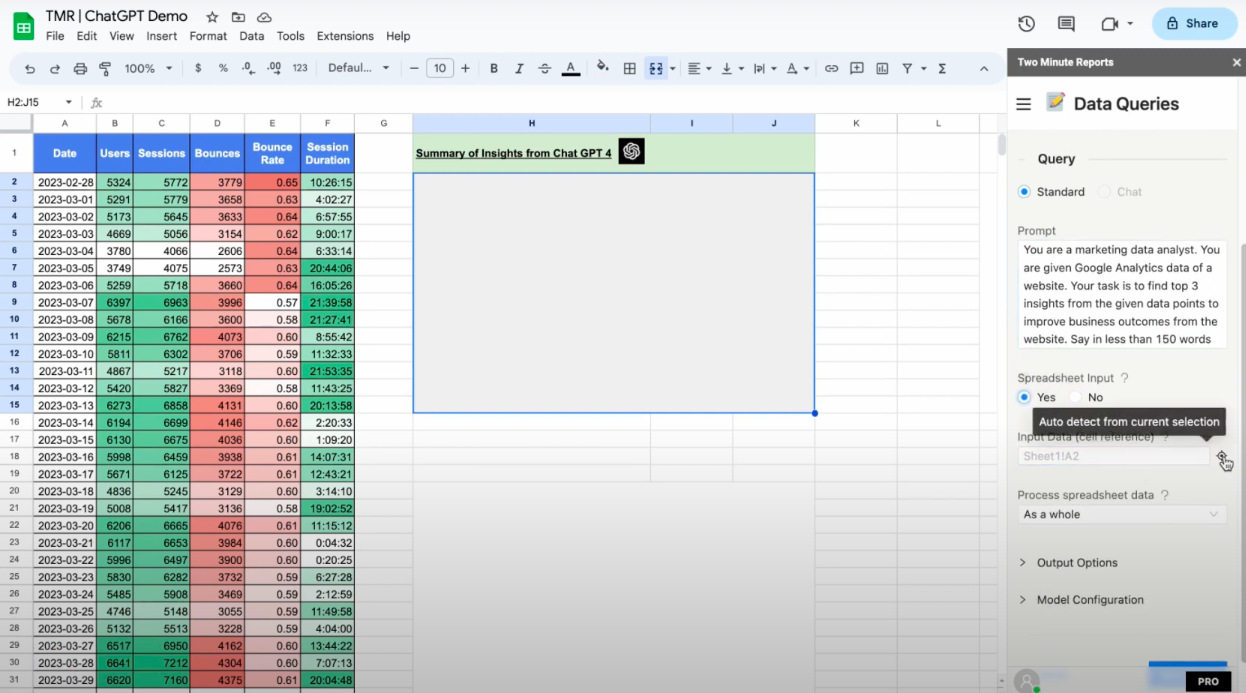
Once you select the cell location, click on Run Query.
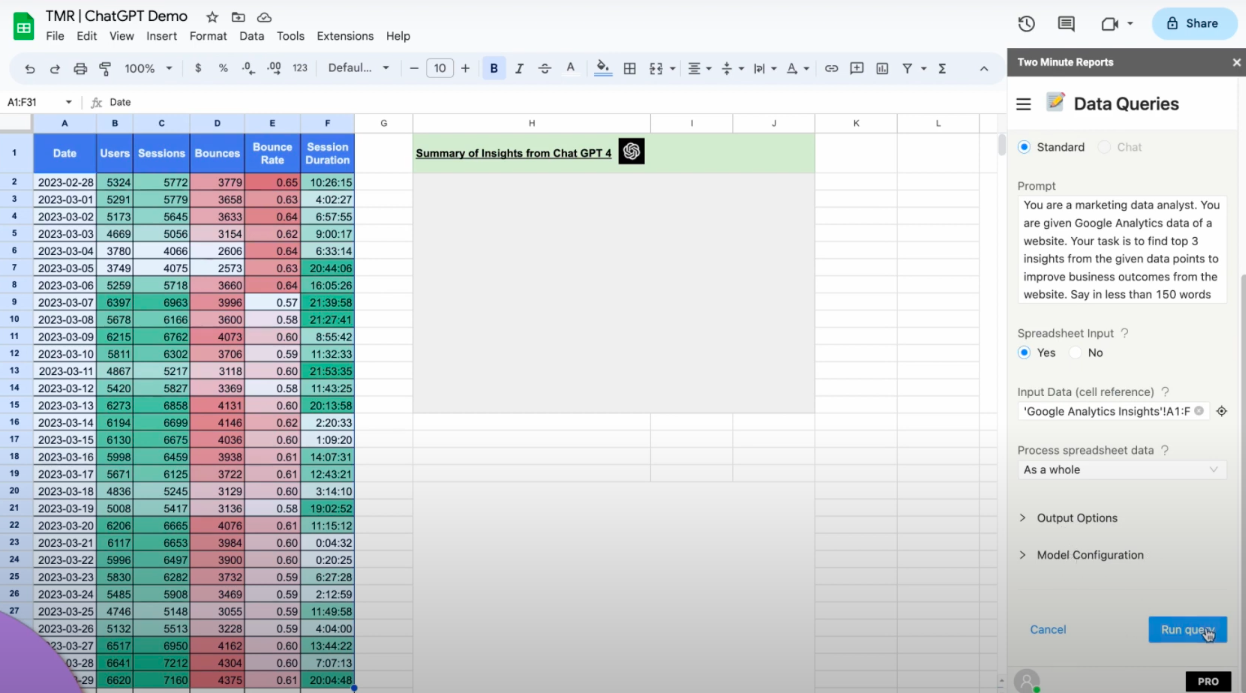
You will get the top three insights for the Google Analytics data in your selected location, as shown below. Click on Yes to save the query.
Example 2: Get automated insights of a Shopify Store dashboard.
We have a Shopify store dashboard with a lot of products and data available from the table. Let’s generate an automated insight table that fetches the top five insights to improve business outcomes.
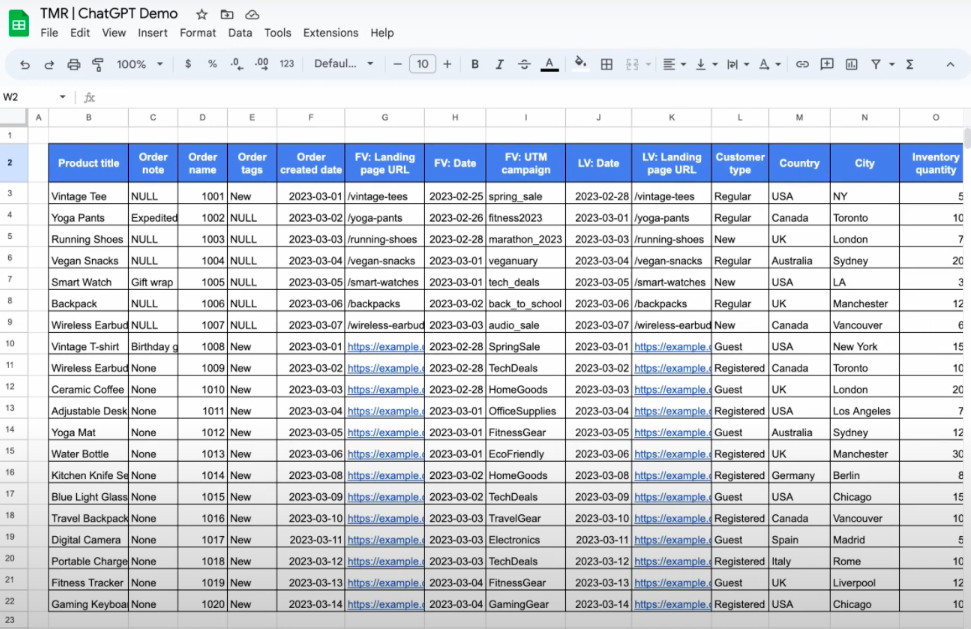
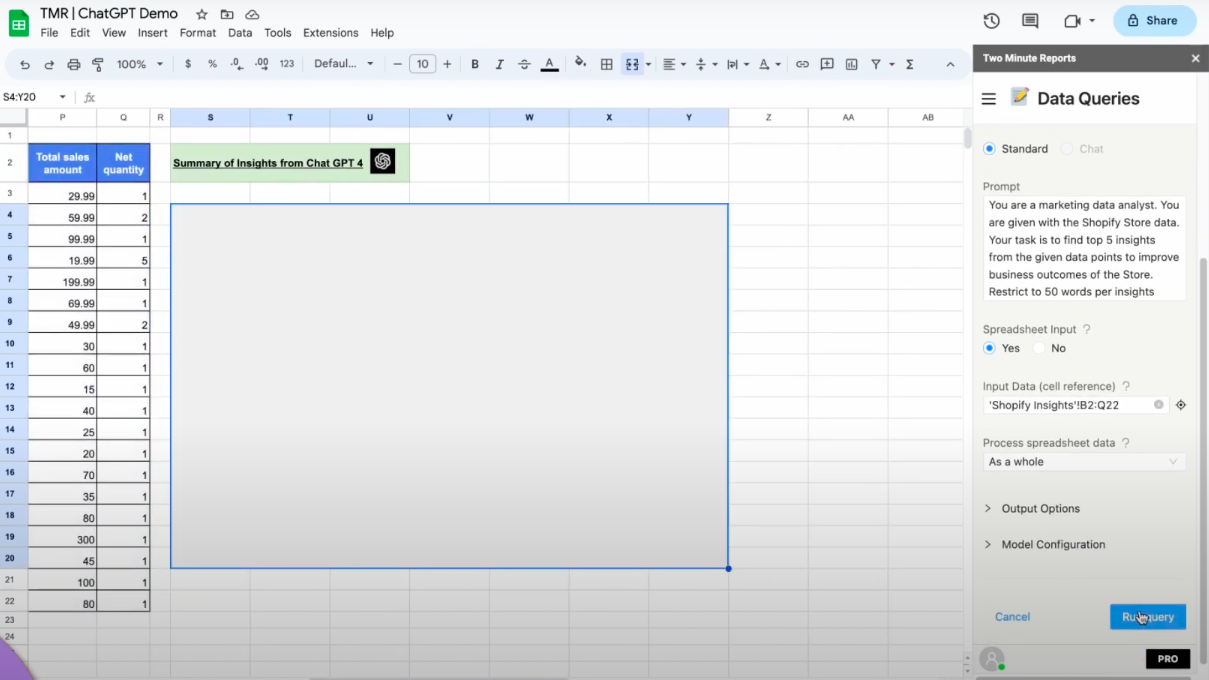
In this process, we will use a prompt like this: “You are a marketing data analyst. You are given the Shopify store data. Your task is to find the top five insights from the given data points to improve business outcomes for the store. Restrict to 50 words per insight.”
Click and drag the data range, then click on the target icon to choose the input cell range.
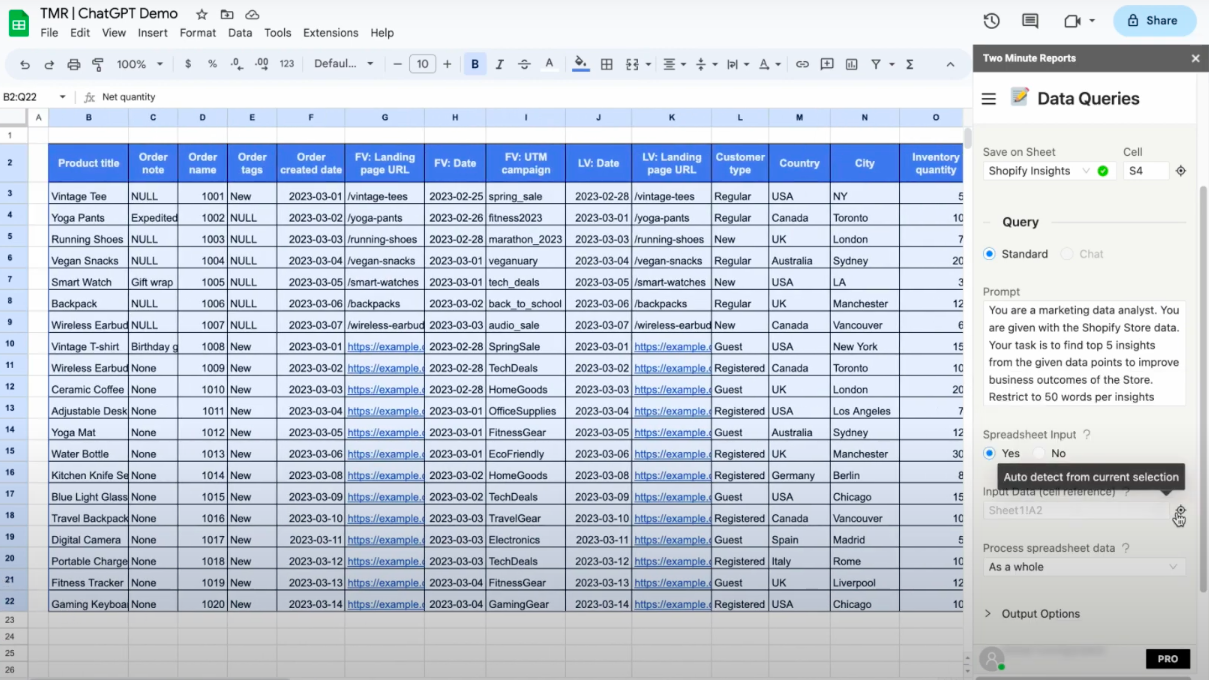
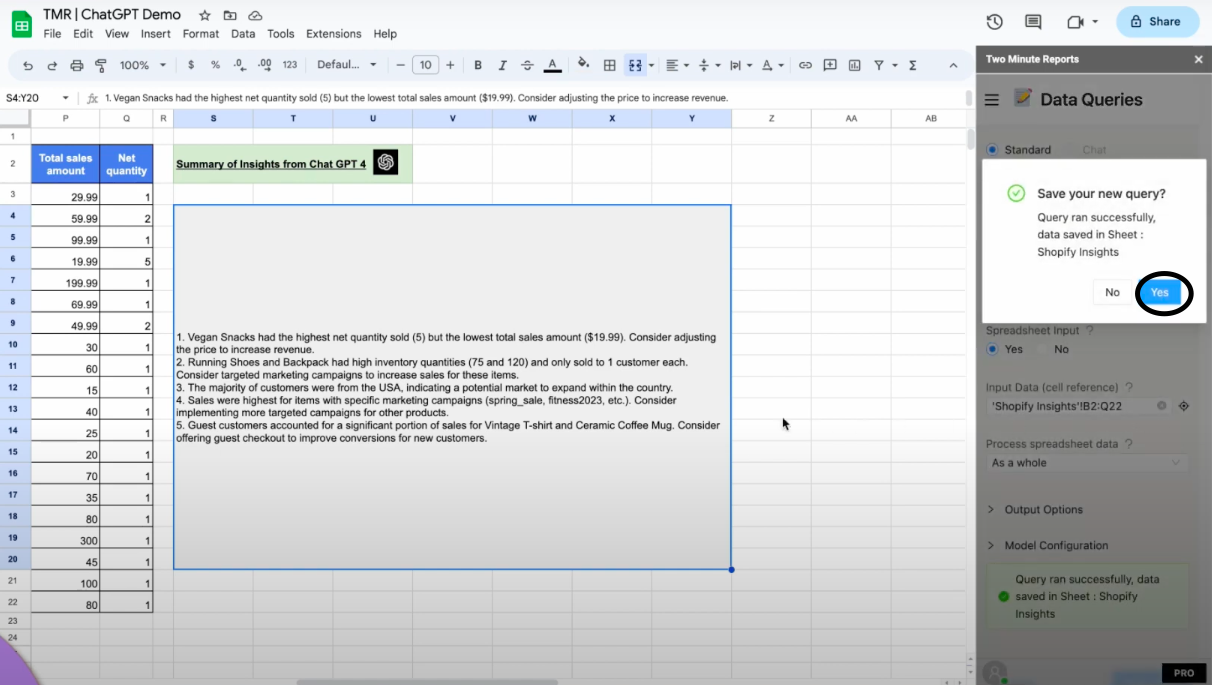
Click on Run query. You will get the top five insights of your Shopify store.

Click on Yes to save the query.
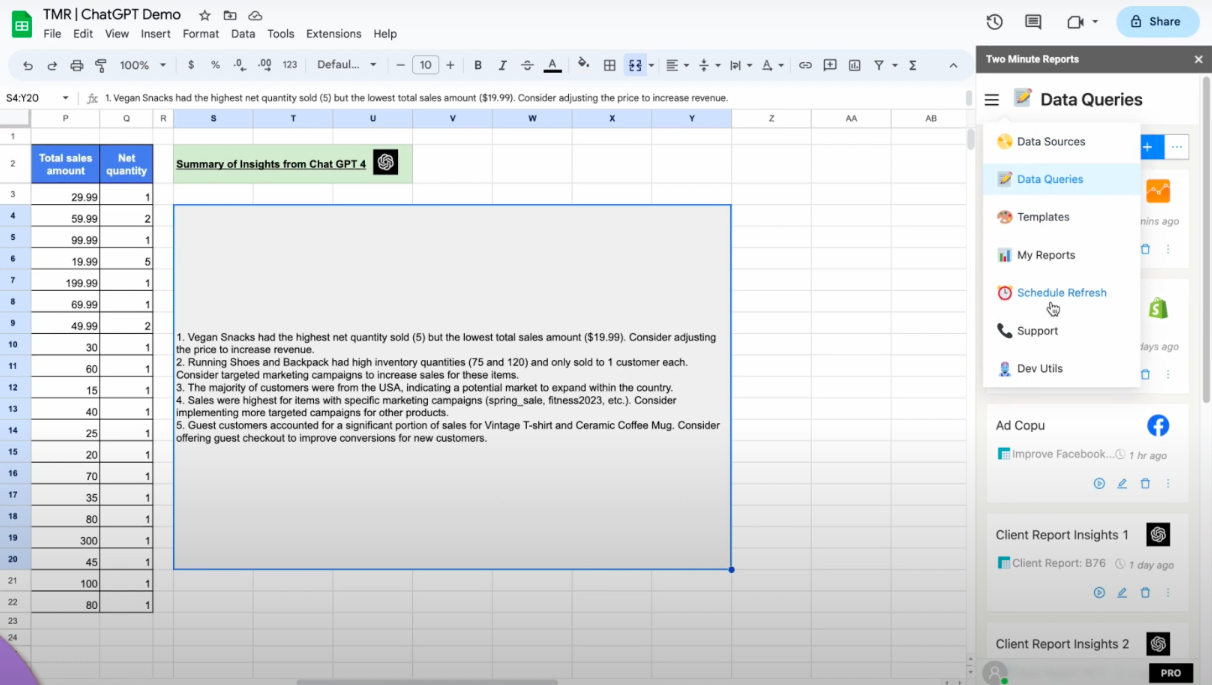
Time to Automate this process. Once you create a ChatGPT Query, move on to the Schedule Refresh section.
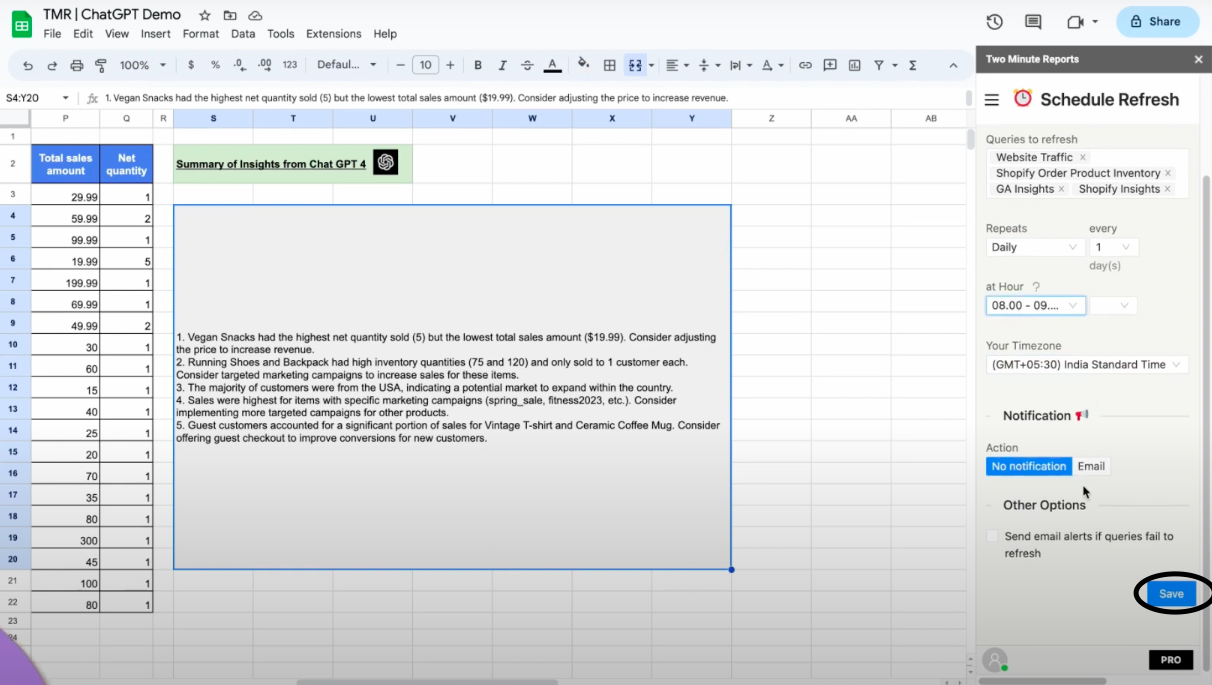
Create a schedule for your newly created ChatGPT query and the other queries like GA and Shopify to concurrently run them. Choose the duration/intervals at which your queries need to be refreshed. You can also get these updated Reports sent to your Email. Click on Save to save the Schedule created.
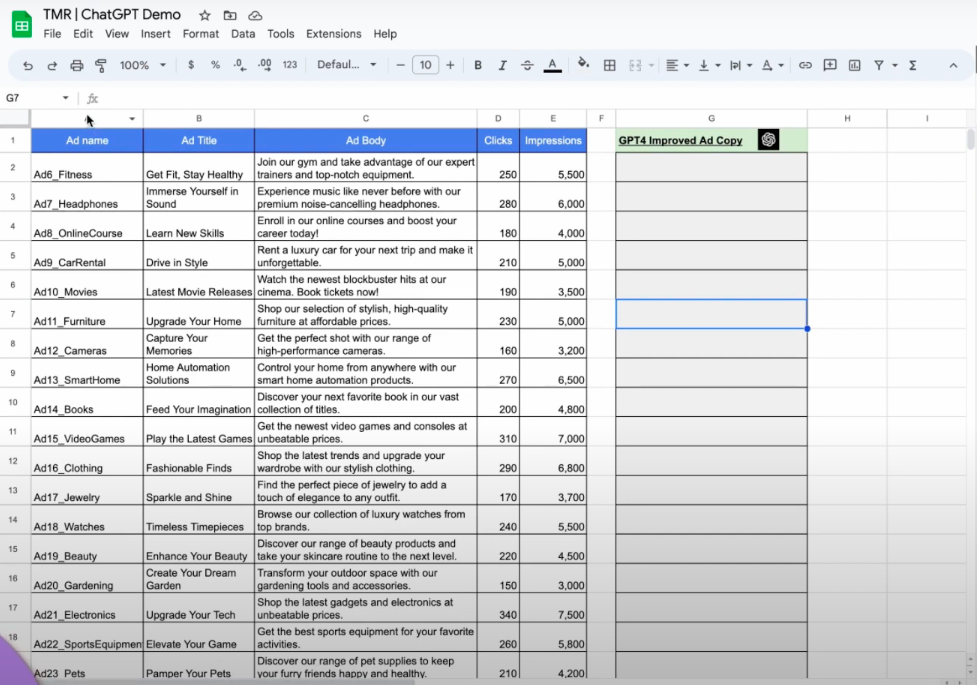
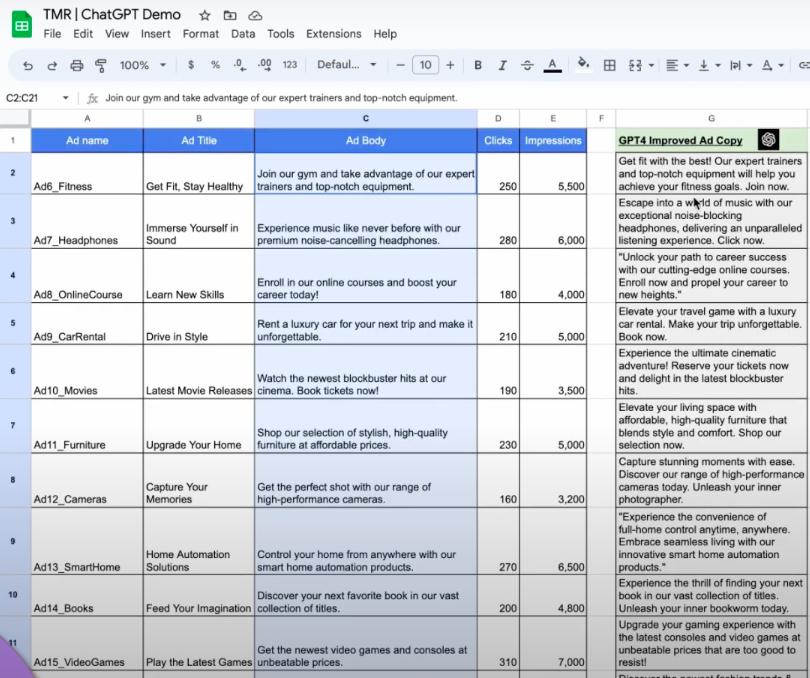
Example 3: Improve Facebook Ad Caption dynamically using ChatGPT.
In this case, we have a Facebook Ads report with its corresponding Ad body, Ad Title, Clicks, and Impressions. From this table, we will modify the Ad Title which will in turn improve the clicks of the Advertisement, which can be done using ChatGPT.
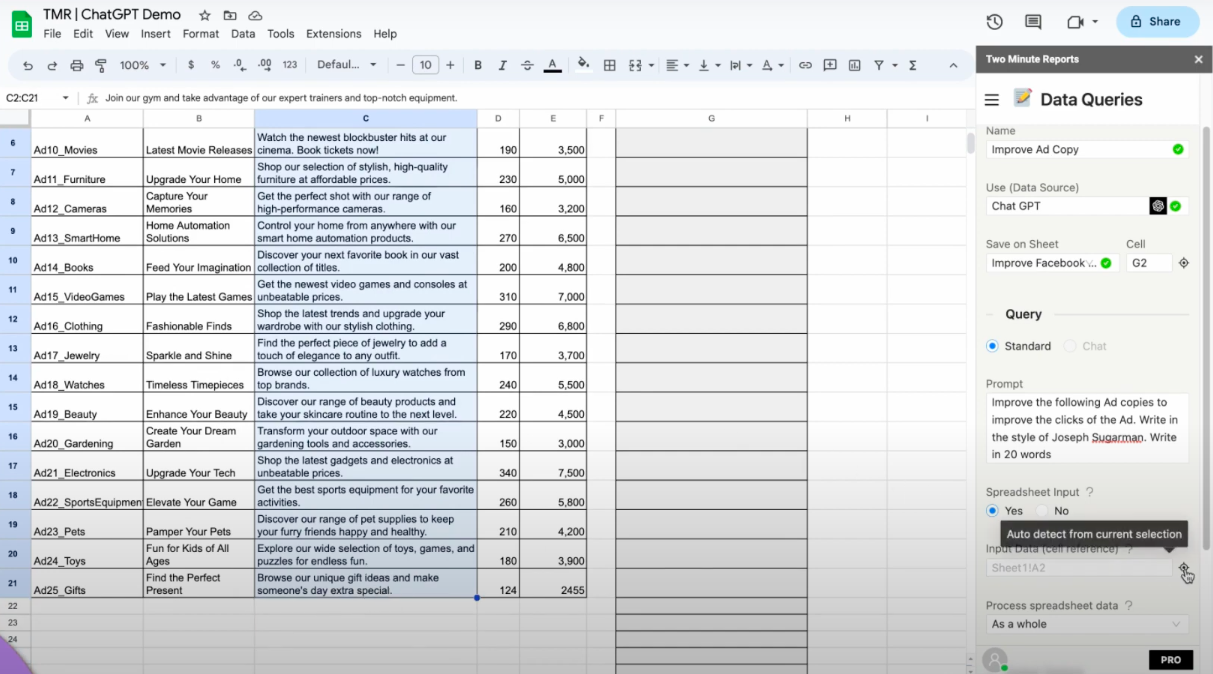
We can also add flavor to the ad title, written in the style of Joseph Sugarman, a great marketing copywriter. Let’s improve the following ad copies to increase clicks. Write in 20 words.
Click and drag on the data range, then choose the target icon to select the data range.
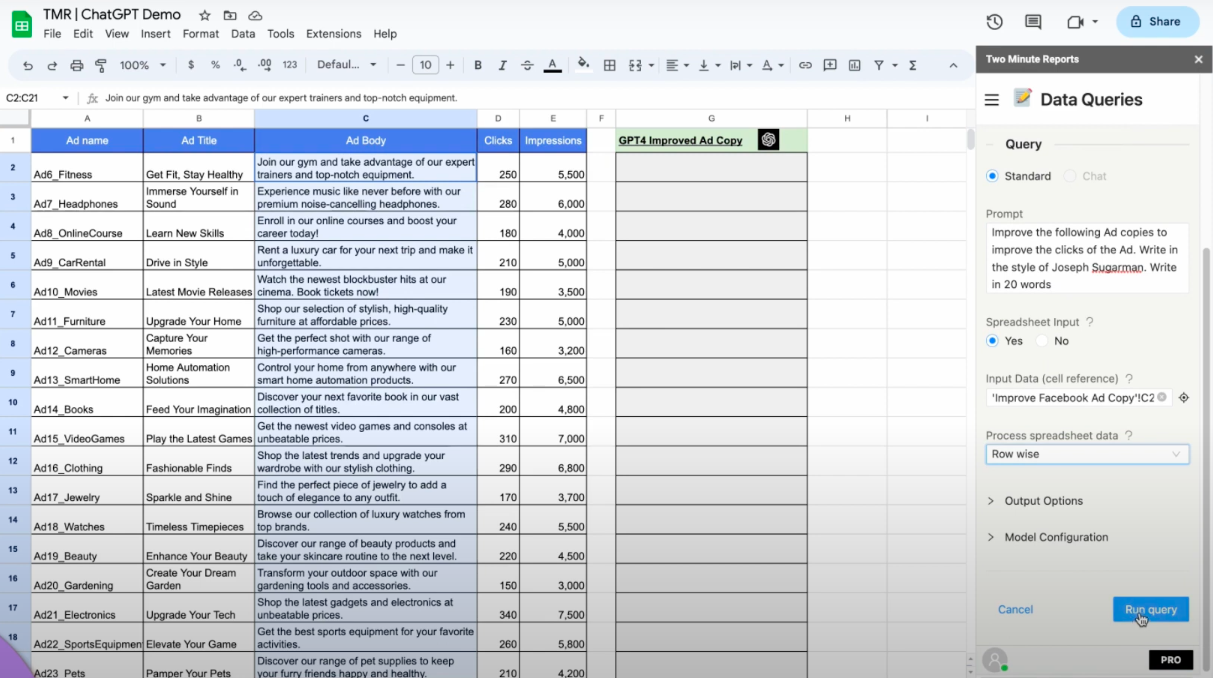
In this process, we would like ChatGPT to infer each ad title and process it in a single cell of a row. Therefore, we will use the row-wise option in the “Process Spreadsheet data” section.
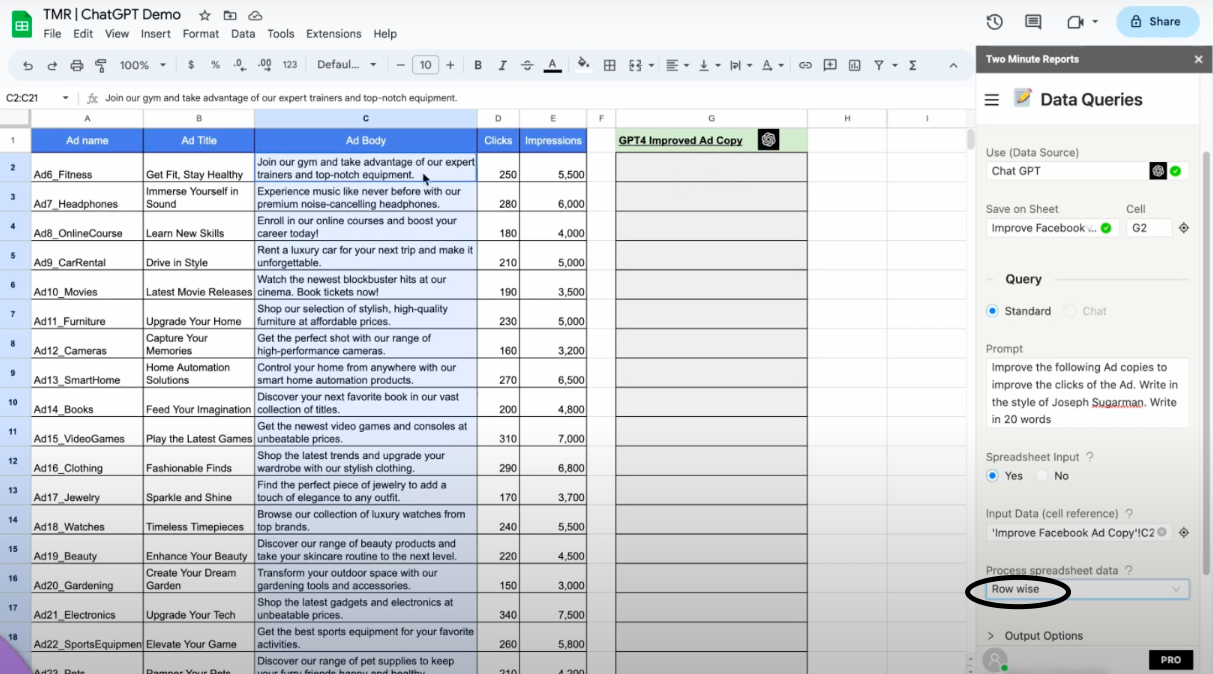
Click on “Run Query” to get the results from ChatGPT.
You can see the impressive results obtained by ChatGPT, which has made all the ad titles more catchy and marketing-oriented.
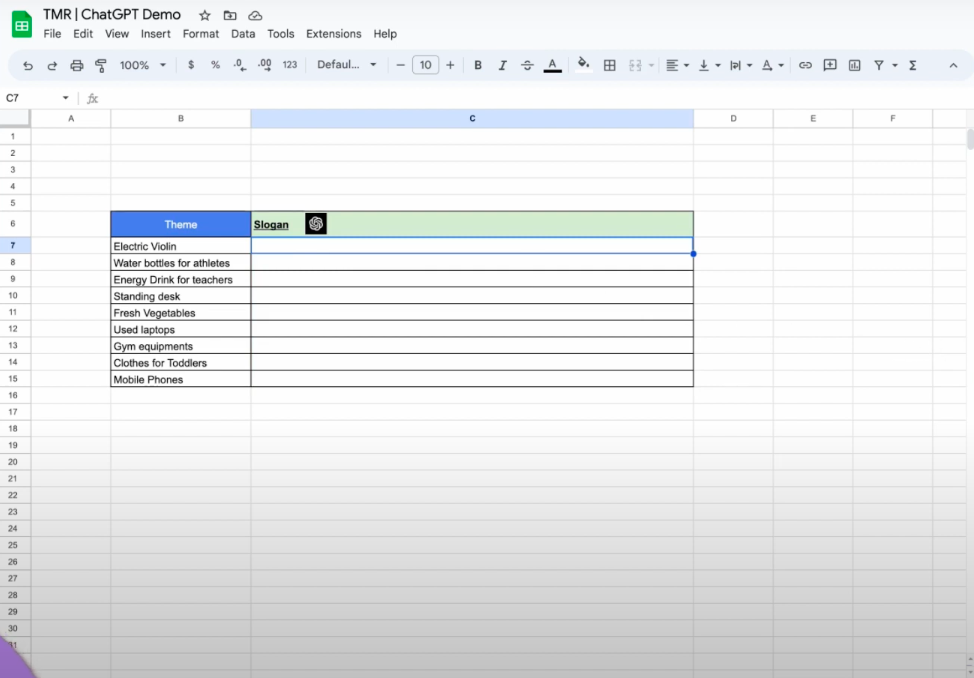
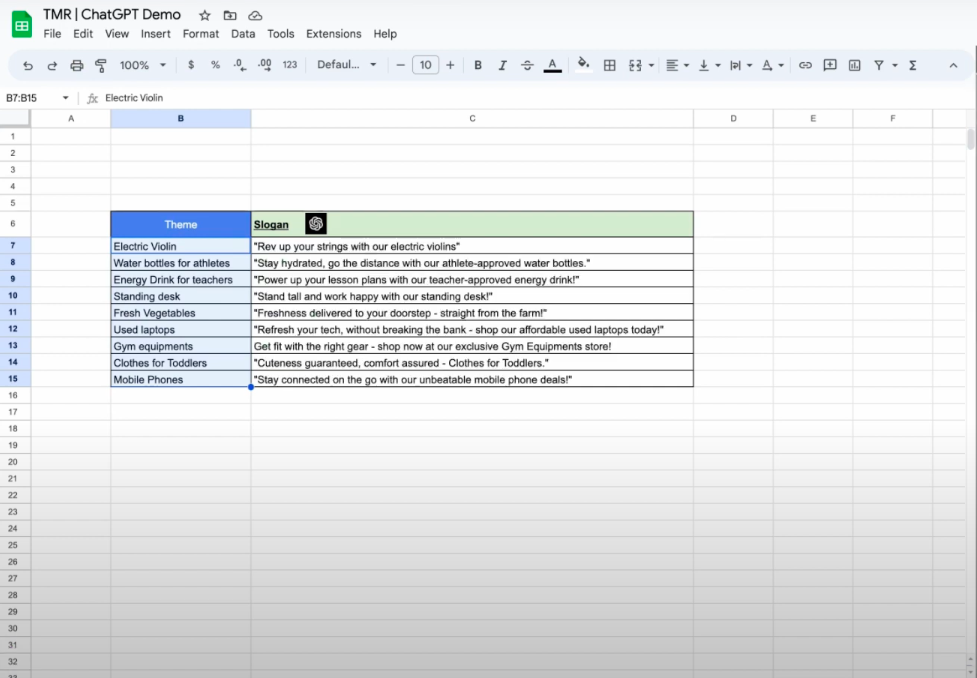
Example 4: Use ChatGPT’s creativity to create marketing slogans for your new products
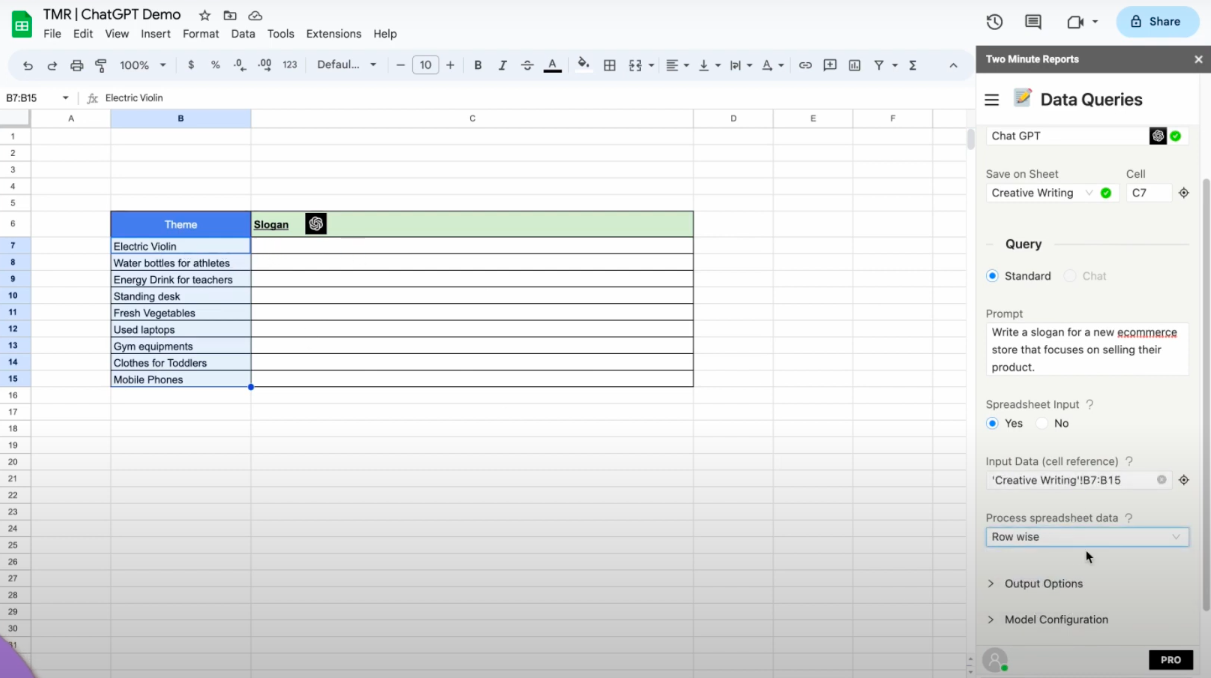
In this example, we will display our newly launching products. With the help of ChatGPT, we will create slogans in the style of a new e-commerce website marketing their products for the first time. Our prompt will be “Write a slogan for a new e-commerce store that focuses on selling their product.”
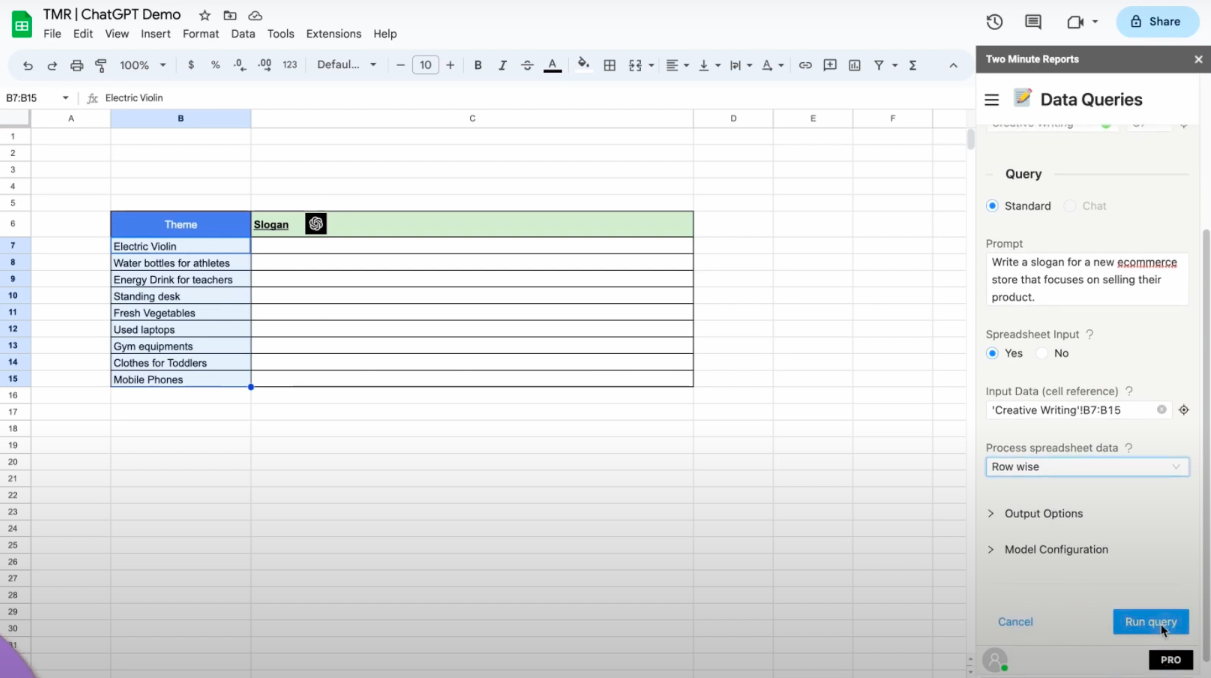
Our input is row-wise, so we need to specify the “Process Spreadsheet data” option as row-wise. Hence, we will get our output data row-wise similar to the input. Click on “Run Query.”
As you can see, the innovative slogans produced by ChatGPT can save you tons of time and produce creativity within seconds.
Example 5: Extract data and fix data errors using ChatGPT
In this example, we have two sections. The first section would consist of extracting a city name from any given address, and the second example will correct errors in the given names and produce the clean name.
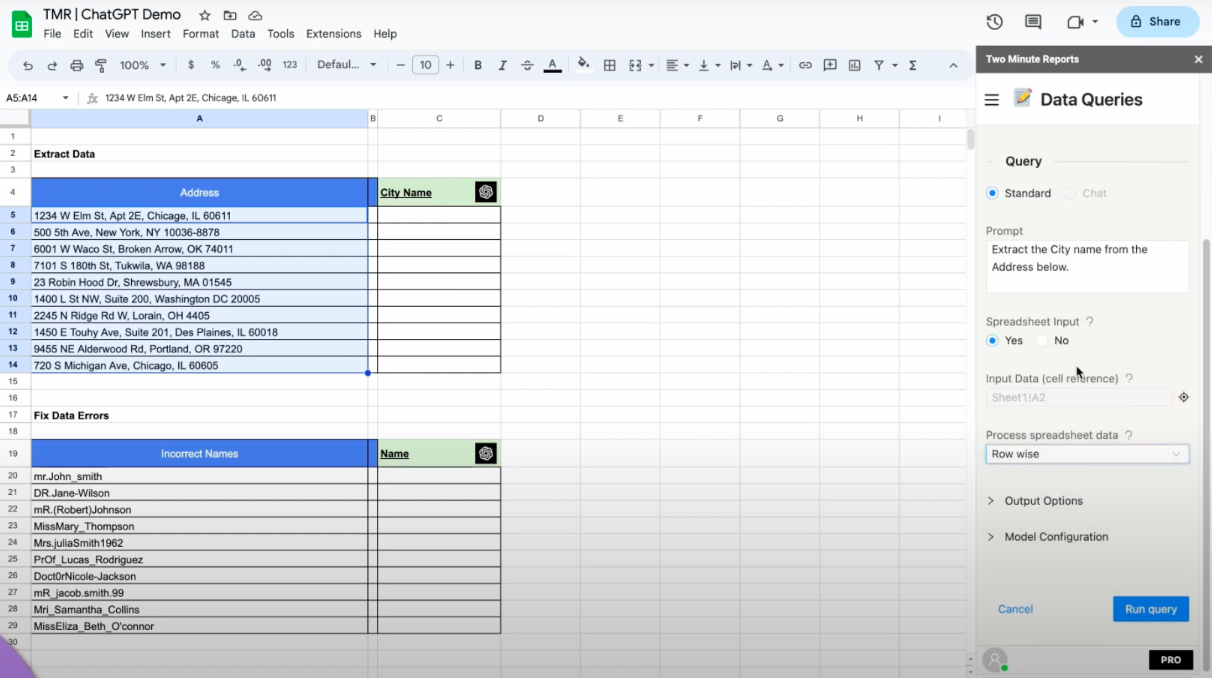
For the first example, we will use the prompt “Extract the city name from the address below” and select the input range. Use “Spreadsheet input” as “Row wise” to compute and produce data row-wise in each cell. Now, click on “Run Query.”
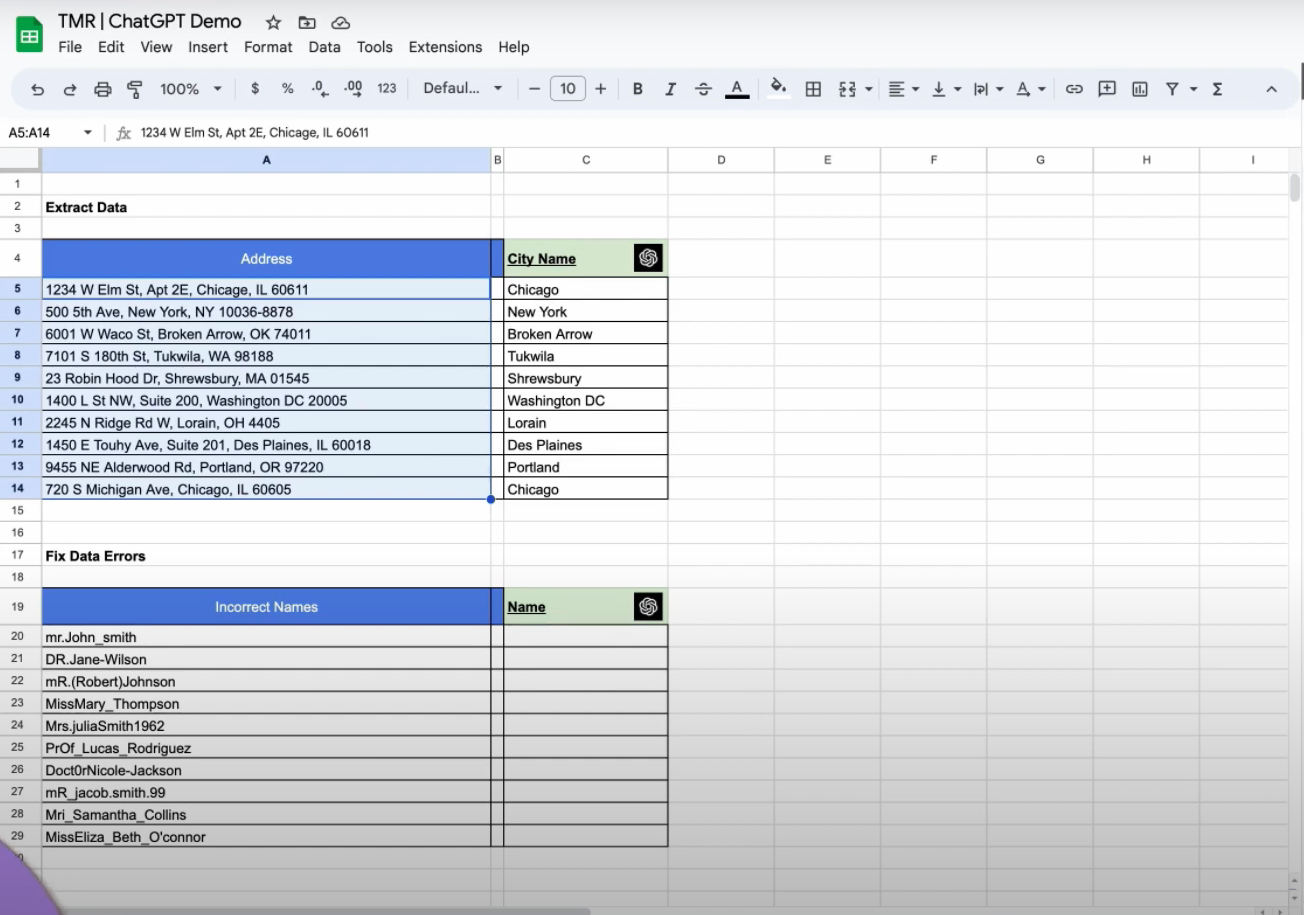
You will now get every city name among the input in your selected output cells.
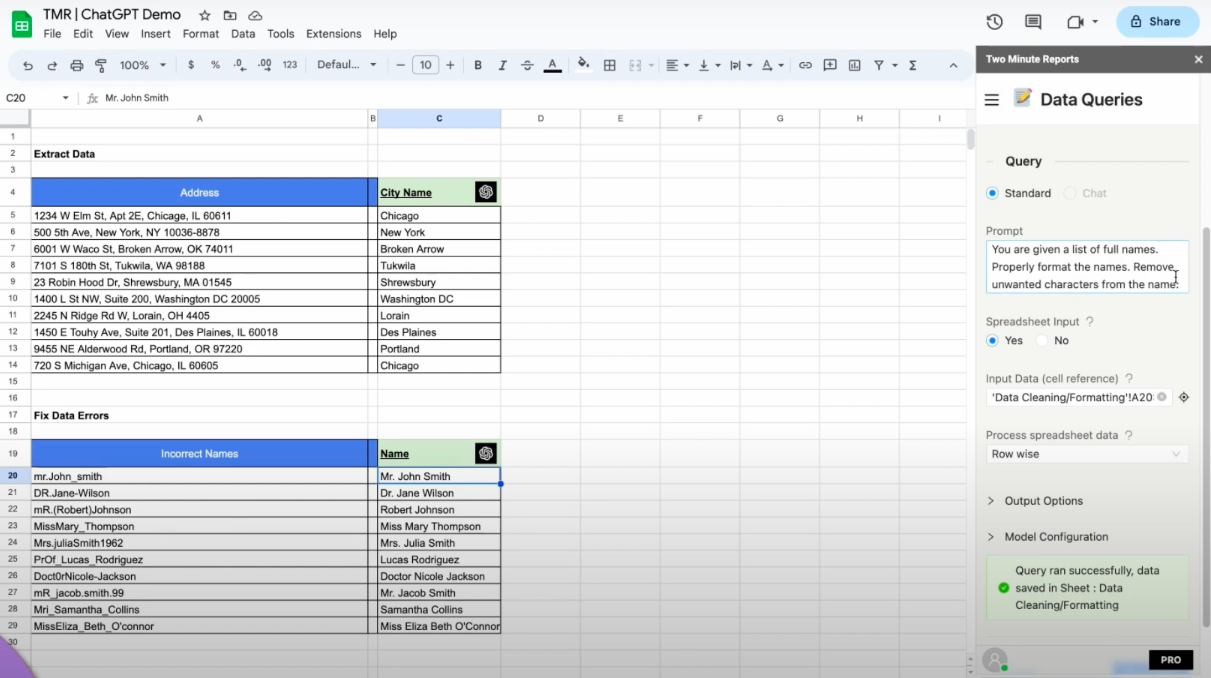
In the second example, you have an input with a list of names that have formatting issues like case mismatch, special characters, salutations, and numbers. Using the prompt “You are given a list of full names. Properly format the names. Remove unwanted characters from the name,” you will be able to remove the errors from the following names and get the proper full names for all your inputs. Select “Process Spreadsheet data” as row-wise and click on “Run Query.”
Example 6: Difference between with and without the “Split data into individual rows” output option.
Without “Split data into individual rows”:
In this example, we will be using a prompt “Describe COVID-19 under 200 words. Point-wise” without any spreadsheet input options. Click on the “Run Query” button.
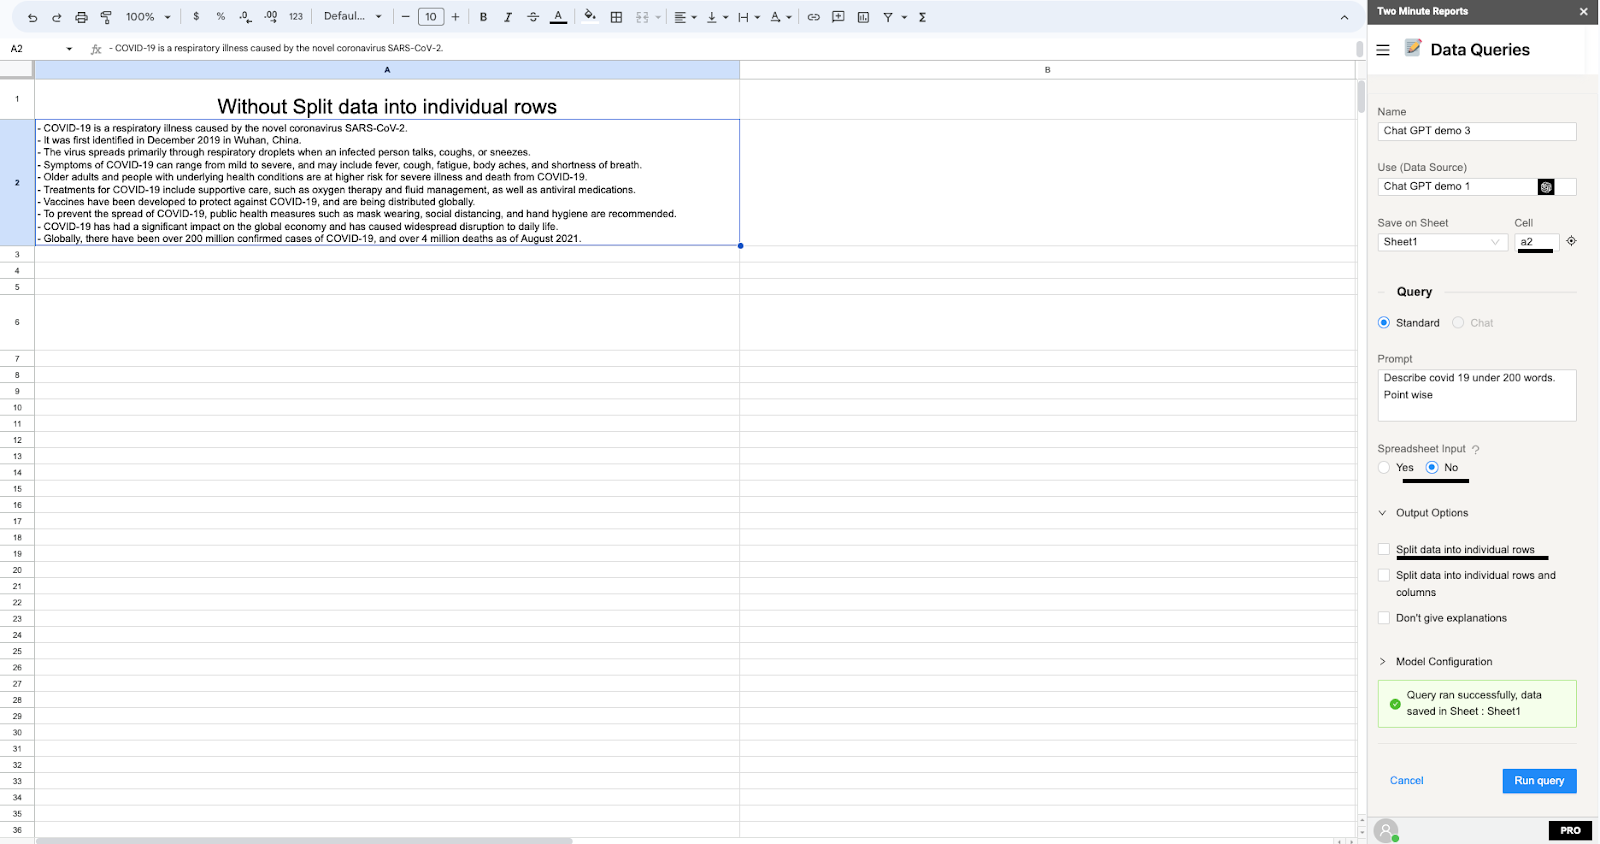
You can see that the output is point-wise and is inside a single cell.
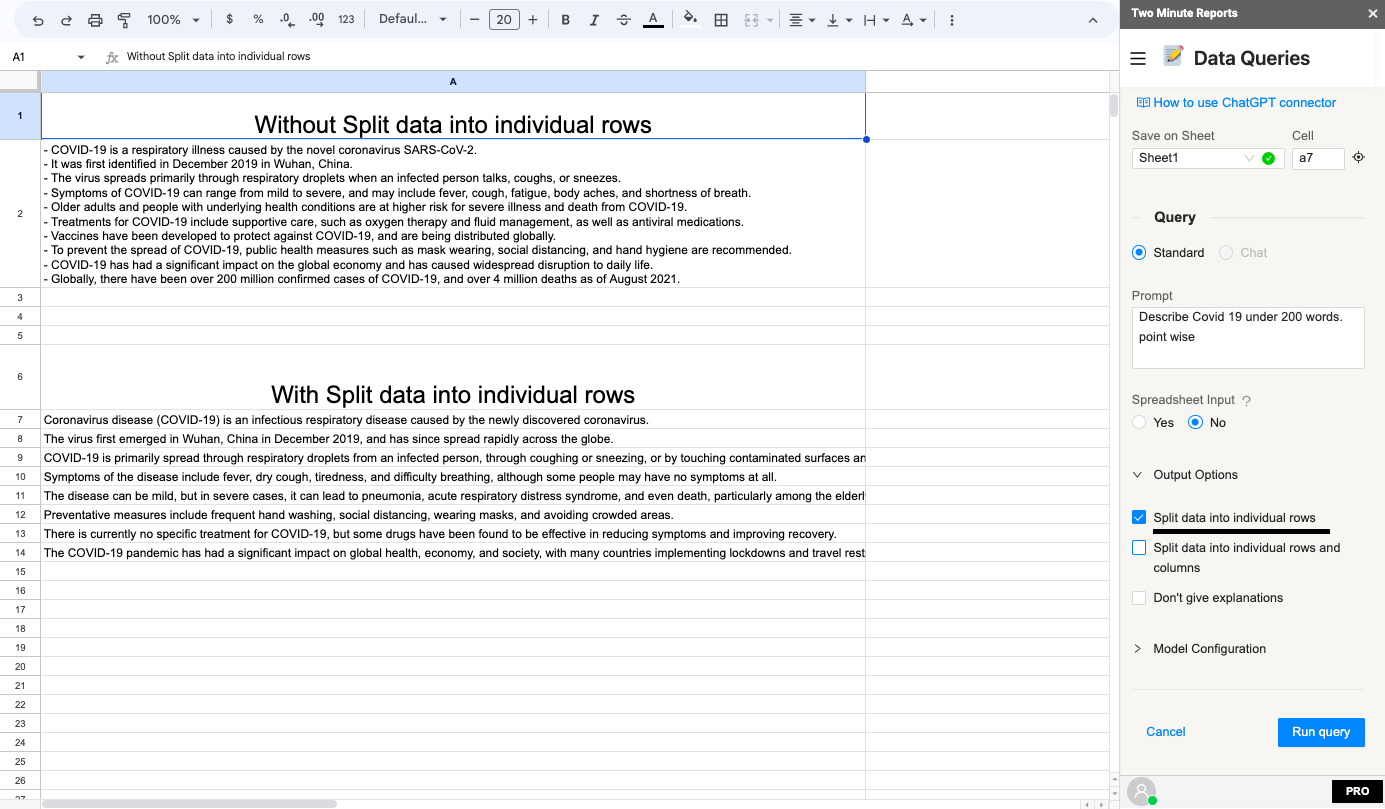
With “Split data into individual rows”:
In this example, we will be using a prompt “Describe COVID-19 under 200 words. Point-wise” without any spreadsheet input options, and selecting the output option as “Split data into individual rows”.
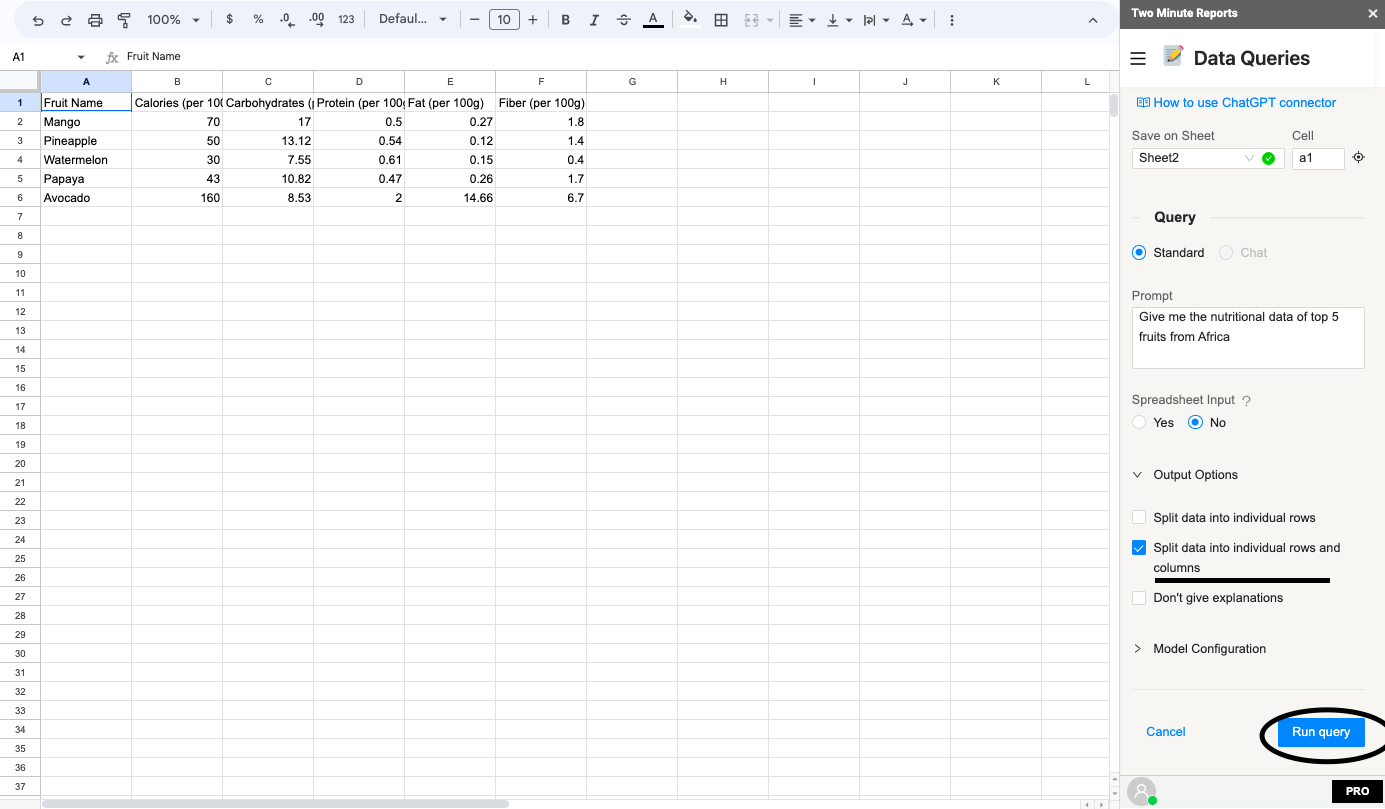
Example 7: Get output in tabular form using “Split data into rows and columns”.
In this example, we will see how to get your ChatGPT output in tabular form (rows and columns). Let’s use this prompt: “Give me the nutritional data of the top 5 fruits from Africa.” Set the Spreadsheet input as “No” and select the output option as “Split data into rows and columns.” Click on the “Run Query” button.
I hope this article helped you create a new ChatGPT article from Scratch.