Introduction
Dates change across different parts of the world. When a query with “Today” or “Last 7 days” as the date range is run, assuming the wrong timezone may give out unexpected results. Using the timezone option you can specify which timezone to use for the “Date range” dropdown in your queries. You can set a global default timezone for your team or set a different one for each query. Not just that you can also default it to the timezone thats in use by your data source provider.
Here is a walk through to help you navigate the timezone option.
Setting Up Your Team Default Timezone
Please follow these steps to set up default timezone settings for all new queries in your team:
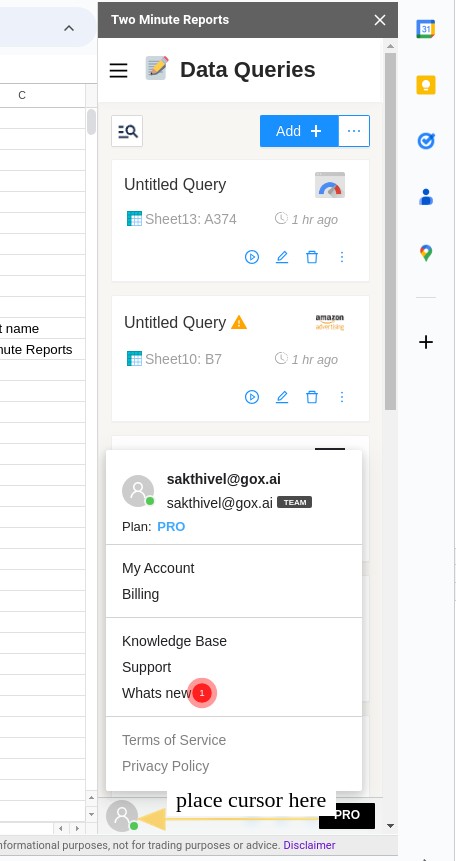
- Go to ‘My Account’. Access this by moving your cursor over the profile symbol located in the footer and select it from the options.
- A new window will appear. In that window, navigate to the ‘Preferences’ tab, and then to ‘Default Query Configurations’.
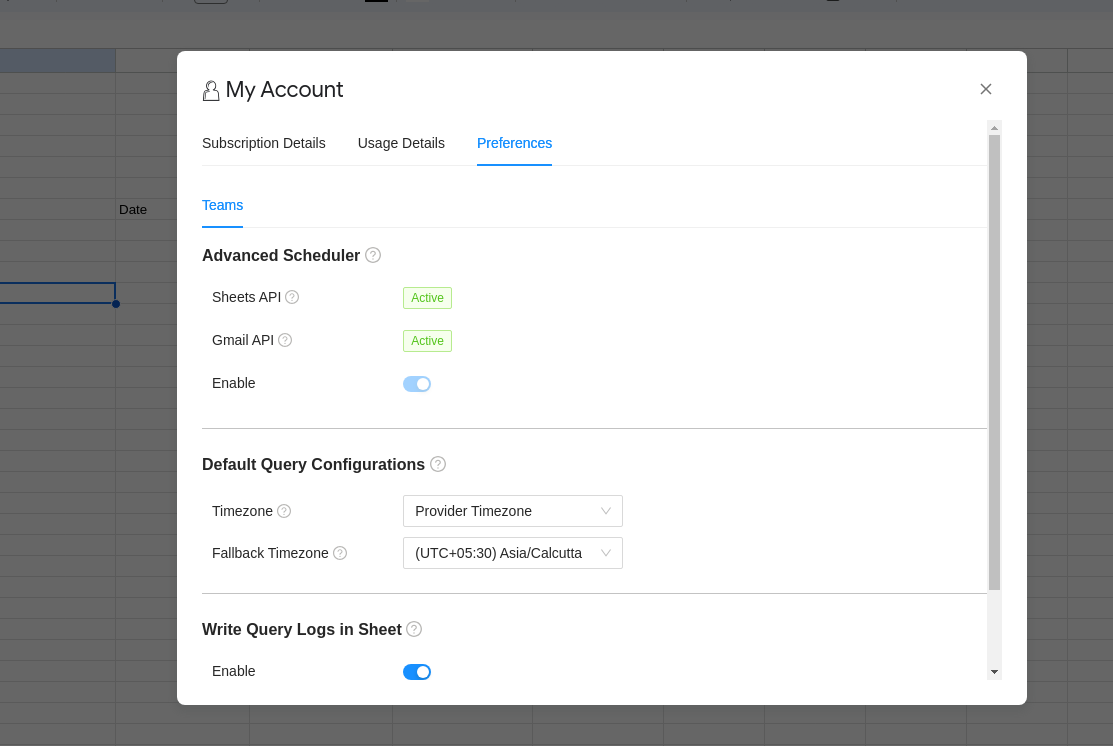
- In the ‘Default Query Configurations’ settings, there are two selectable options:
- The first option, titled ‘Timezone’, allows you to choose between ‘Provider Timezone’, or ‘Custom Timezone’.
- Provider Timezone: When you select this, Two Minute Reports will use the timezone that you have set in your data source (e.g., Facebook Ads Account, Shopify Shop, etc.) for your queries. This means, if your Facebook Ads account is set to the Eastern Standard Time, Two Minute Reports will use the same for your queries.
- Custom Timezone: This option allows you to manually set a preferred timezone for your queries, irrespective of the timezone of your data source account. For instance, even if your data source account is set to Eastern Standard Time, but you want to see the query results in Indian Standard Time, choose this option, and manually set the timezone. This option is particularly useful when you are dealing with data from different time zones but want a uniform view.
- The second option changes based on what you’ve chosen in the first:
- If you choose ‘Provider Timezone’, your second option becomes ‘Fallback Timezone’. This will be the timezone used for your queries when the Provider Timezone is not available, or for data sources that don’t provide account timezone information.
- If you pick ‘Custom Timezone’, the second option allows you to select your preferred timezone from a list of global timezones.
Once you make your selection, it is saved and updated automatically.
NOTE: Now, all new queries will use these ‘Team Default’ timezone settings by default. Moreover, all saved queries that use ‘Team Default’ settings will automatically reflect any changes made here.
Changing Timezone for an Individual Query
By default, individual queries operate under the team’s default timezone settings. However, you have the option to set a different timezone for each individual query
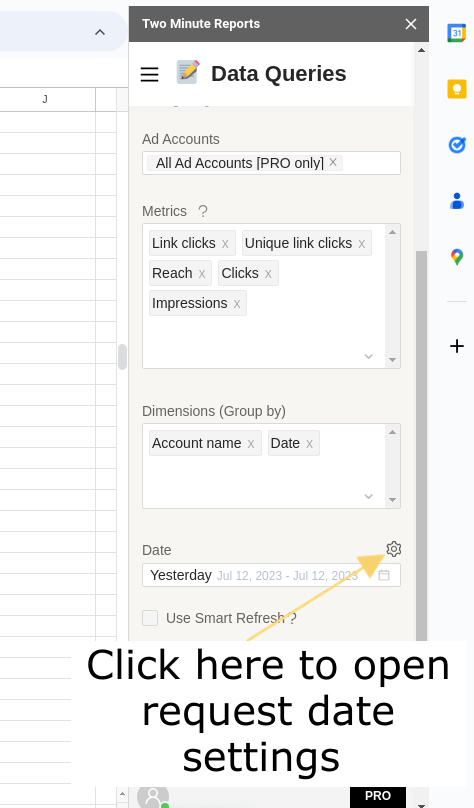
- When you ‘Add’ or ‘Edit’ a query, go to the date settings
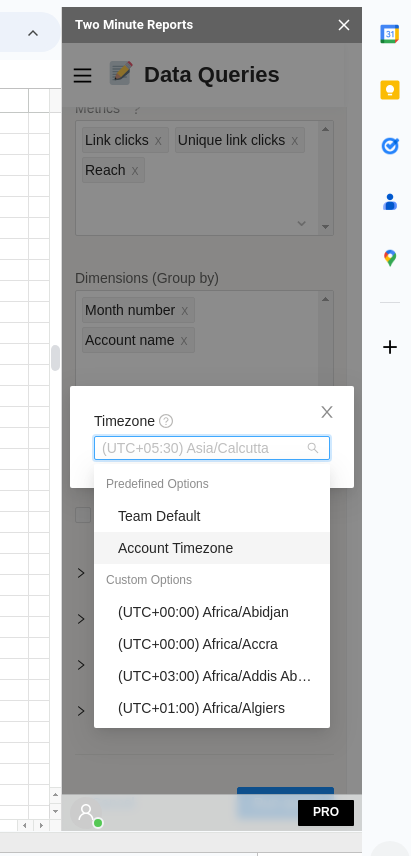
- A new window will open where you can select your timezone. By default, ‘Team Default’ and the various global timezones will be available. If the data source for this query provides timezone information (for example, ‘Account Timezone’ for Facebook Ads or ‘Shop Timezone’ for Shopify), this will be shown as an option.
Now you are equipped to control the timezone for the request date range of your queries. If you have any questions, don’t hesitate to reach out.